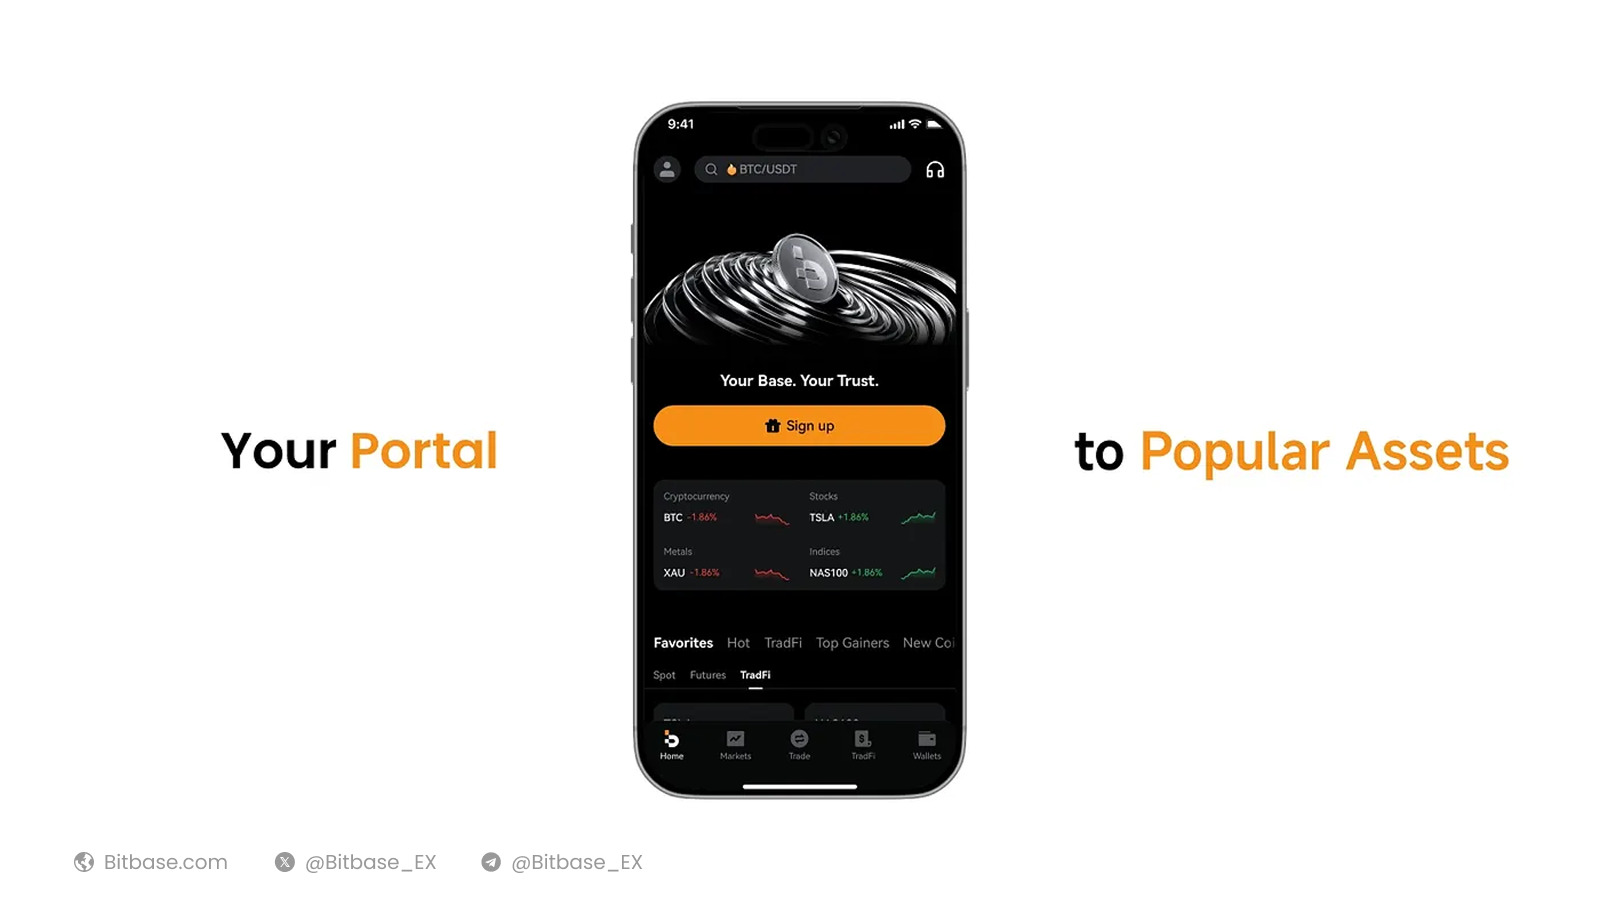
A step-by-step guide to trading on the Bitbase mobile app: place your first Spot order, then open and manage a USDT-M perpetual Futures position. Example pair: BTC/USDT.
Before you start
You need funds in your account before you can trade — see the Bitbase app deposit guide first. Complete identity verification to unlock full limits. Open the Bitbase app and log in.
Risk notice: crypto prices are volatile and you can lose money. Futures use leverage, which magnifies both gains and losses and can lead to liquidation — the loss of your entire margin. Only trade what you can afford to lose. This guide is educational and is not financial advice.
Part 1 — Spot trading
Step 1 · Open the Spot trading screen
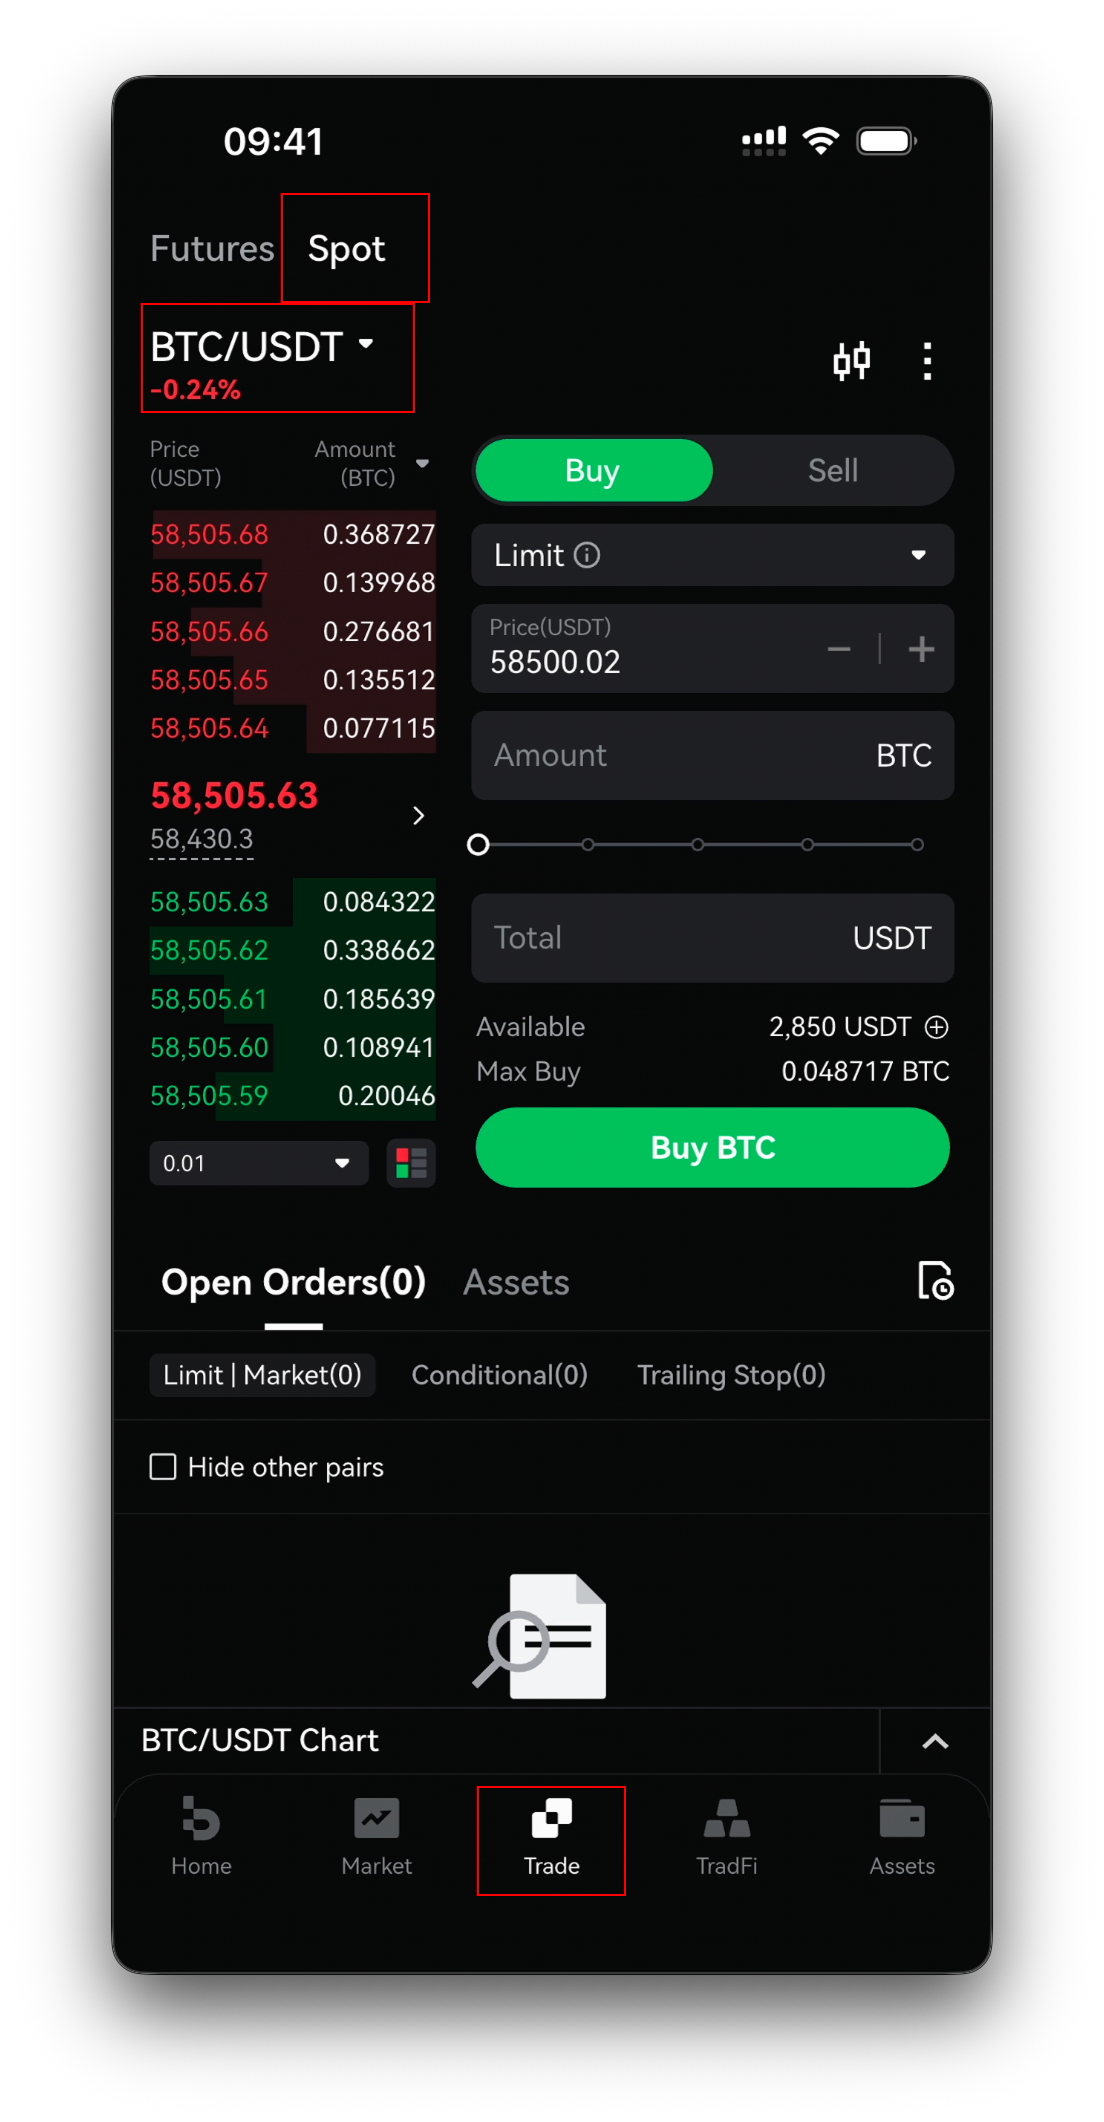
Tap Trade in the bottom navigation, then choose the Spot tab at the top. The trading screen shows the order book on the left and the order-entry panel on the right, with the price chart lower down.
Step 2 · Select a trading pair
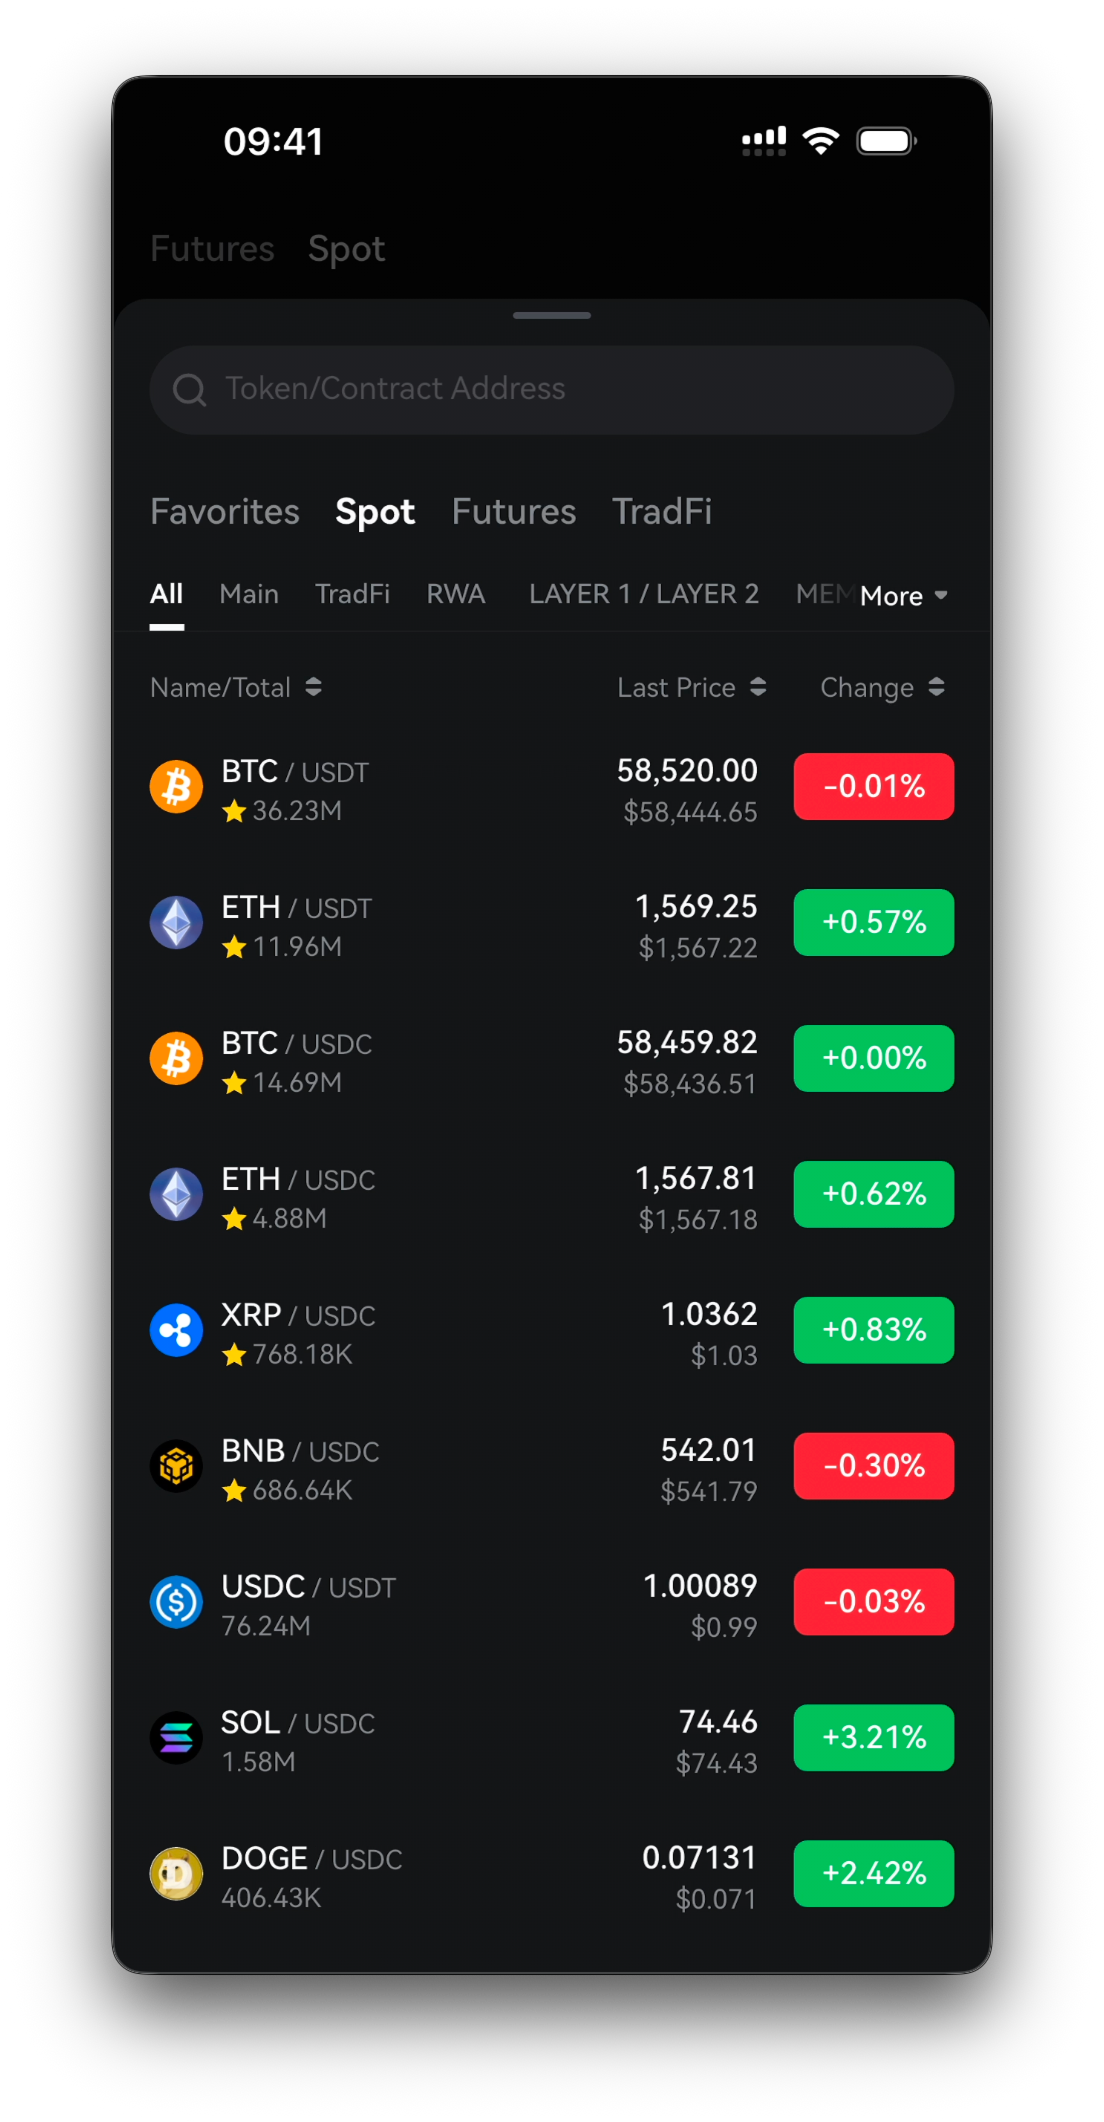
Tap the pair name at the top left (e.g. BTC/USDT) to open the list. Search for a coin or switch between the Spot / Futures / TradFi tabs, then tap the pair you want.
Step 3 · Choose Buy/Sell and an order type
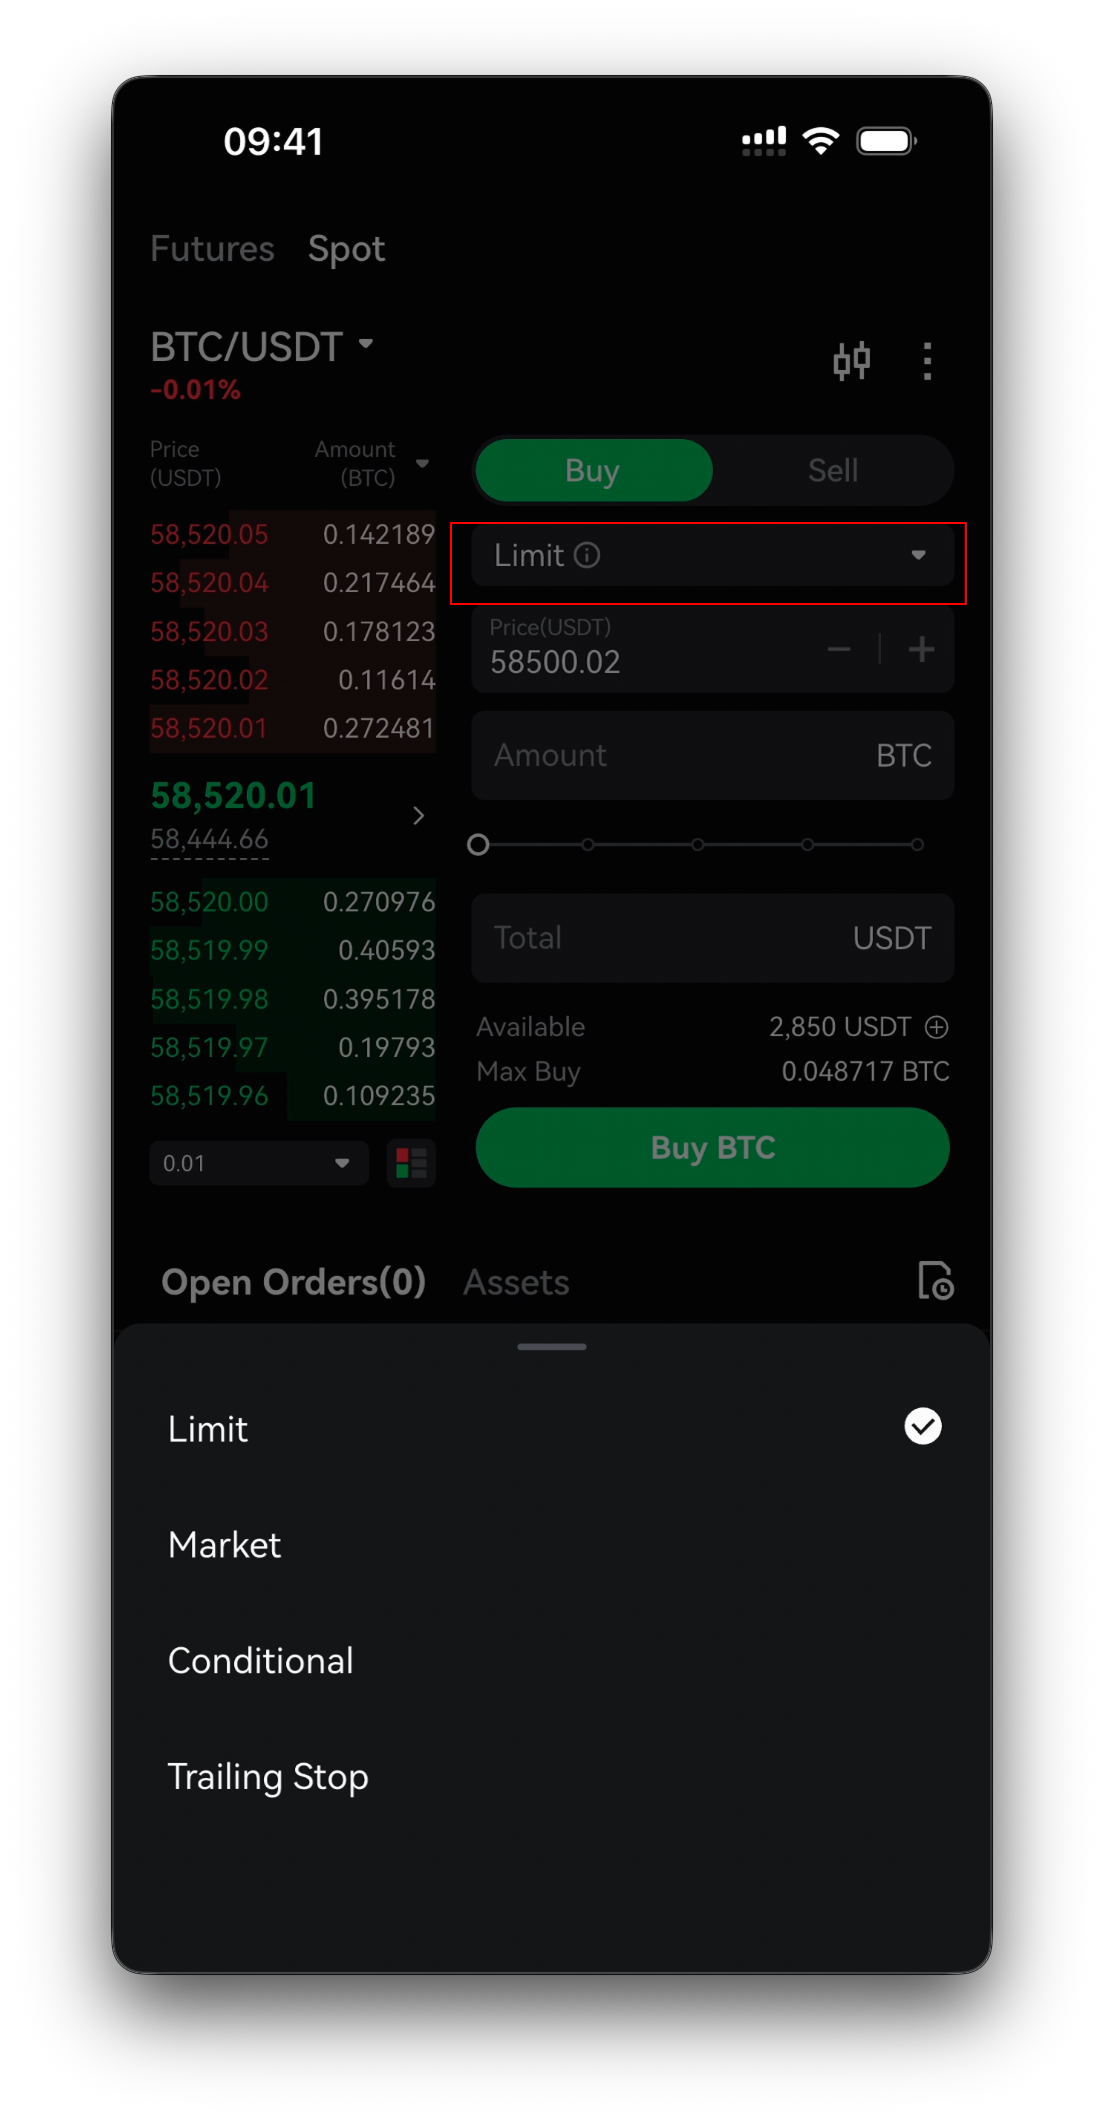
Tap Buy (green) or Sell, then open the order-type menu (Limit by default) to choose Limit (you set the price), Market (fills instantly at the best price), Conditional or Trailing Stop.
Step 4 · Enter the order and place it
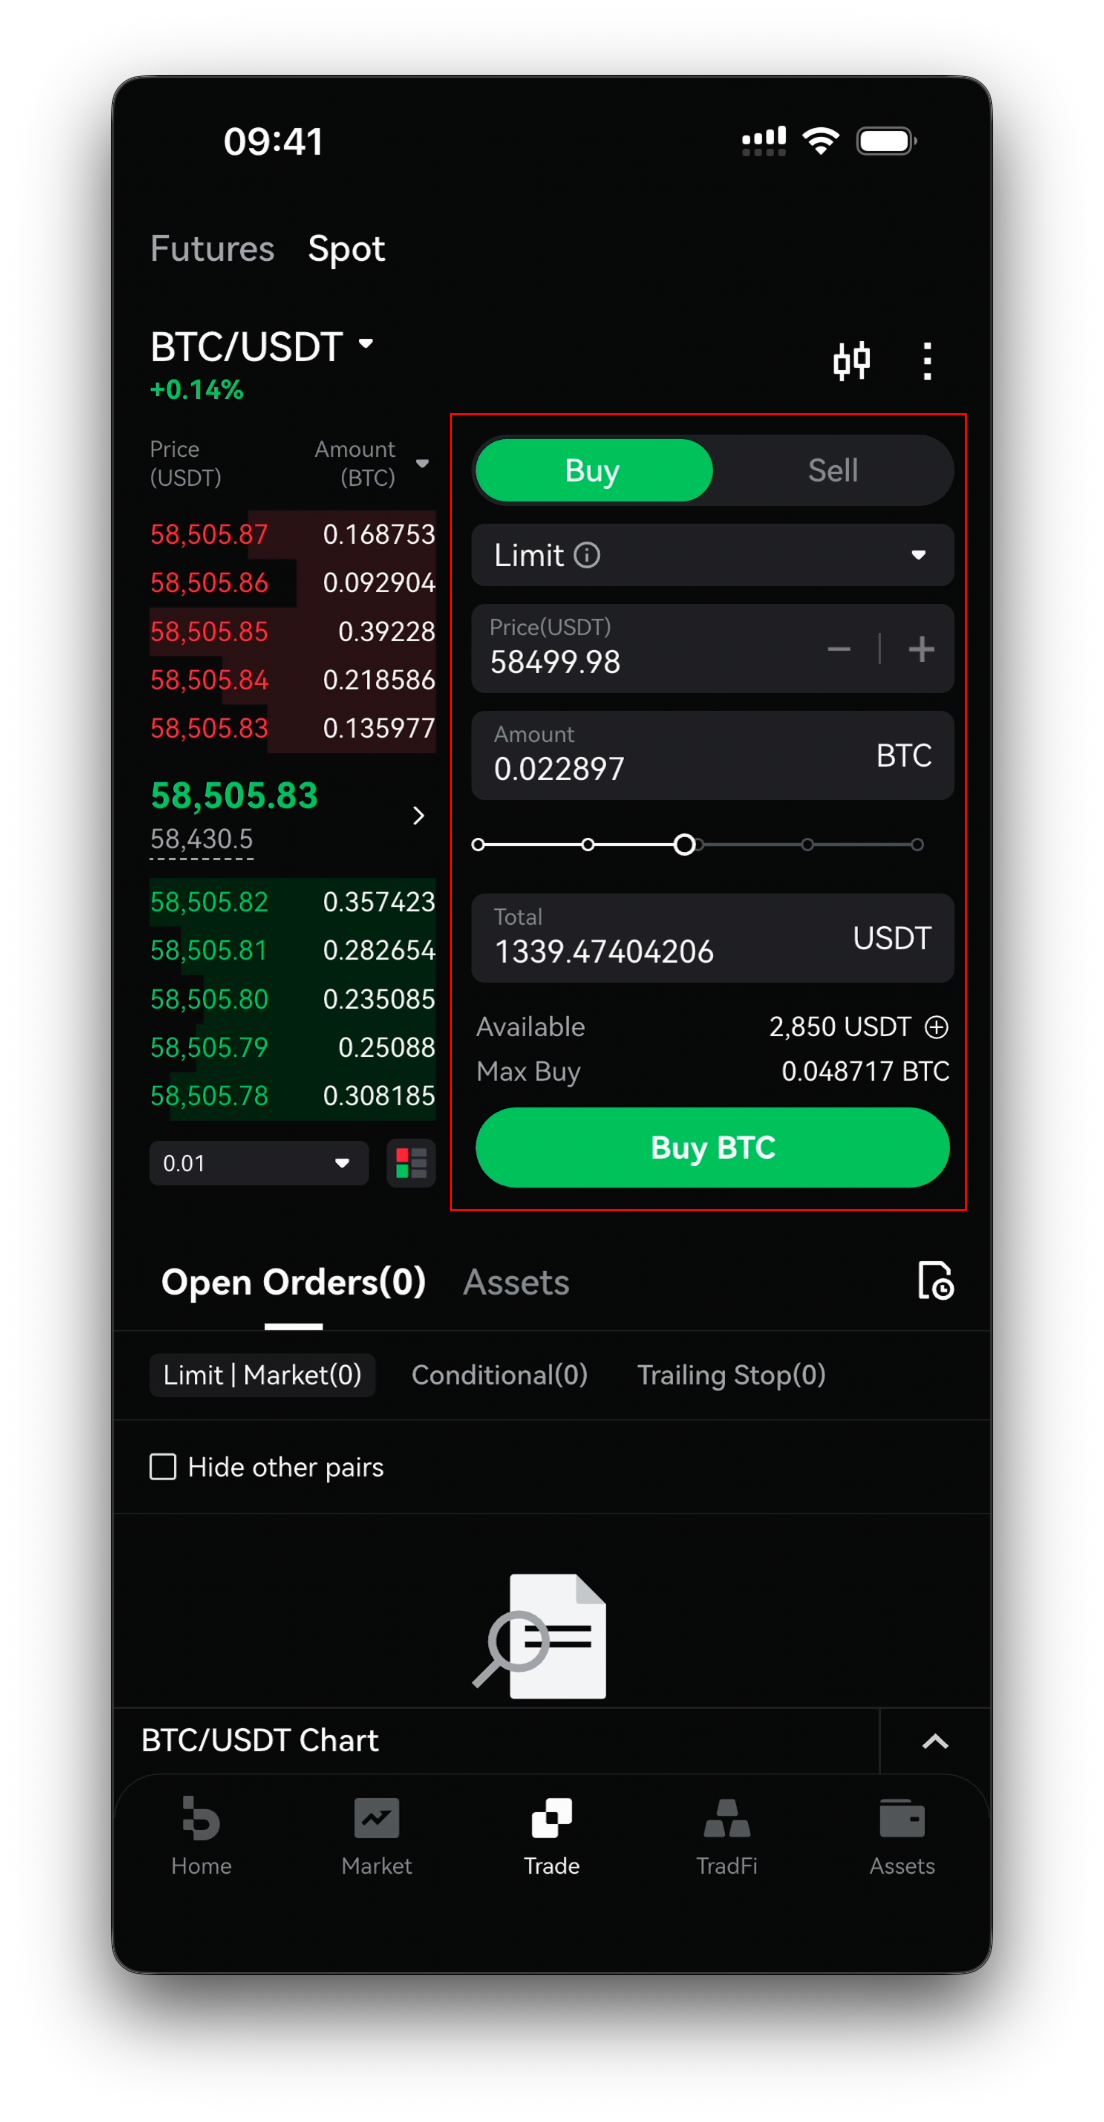
For a Limit order, enter a Price and Amount, or drag the percentage slider. Check Total, your Available balance and Max Buy, then tap the green Buy BTC (or red Sell BTC). For a Market order the price is set automatically — just enter the amount or total.
Step 5 · Track your orders
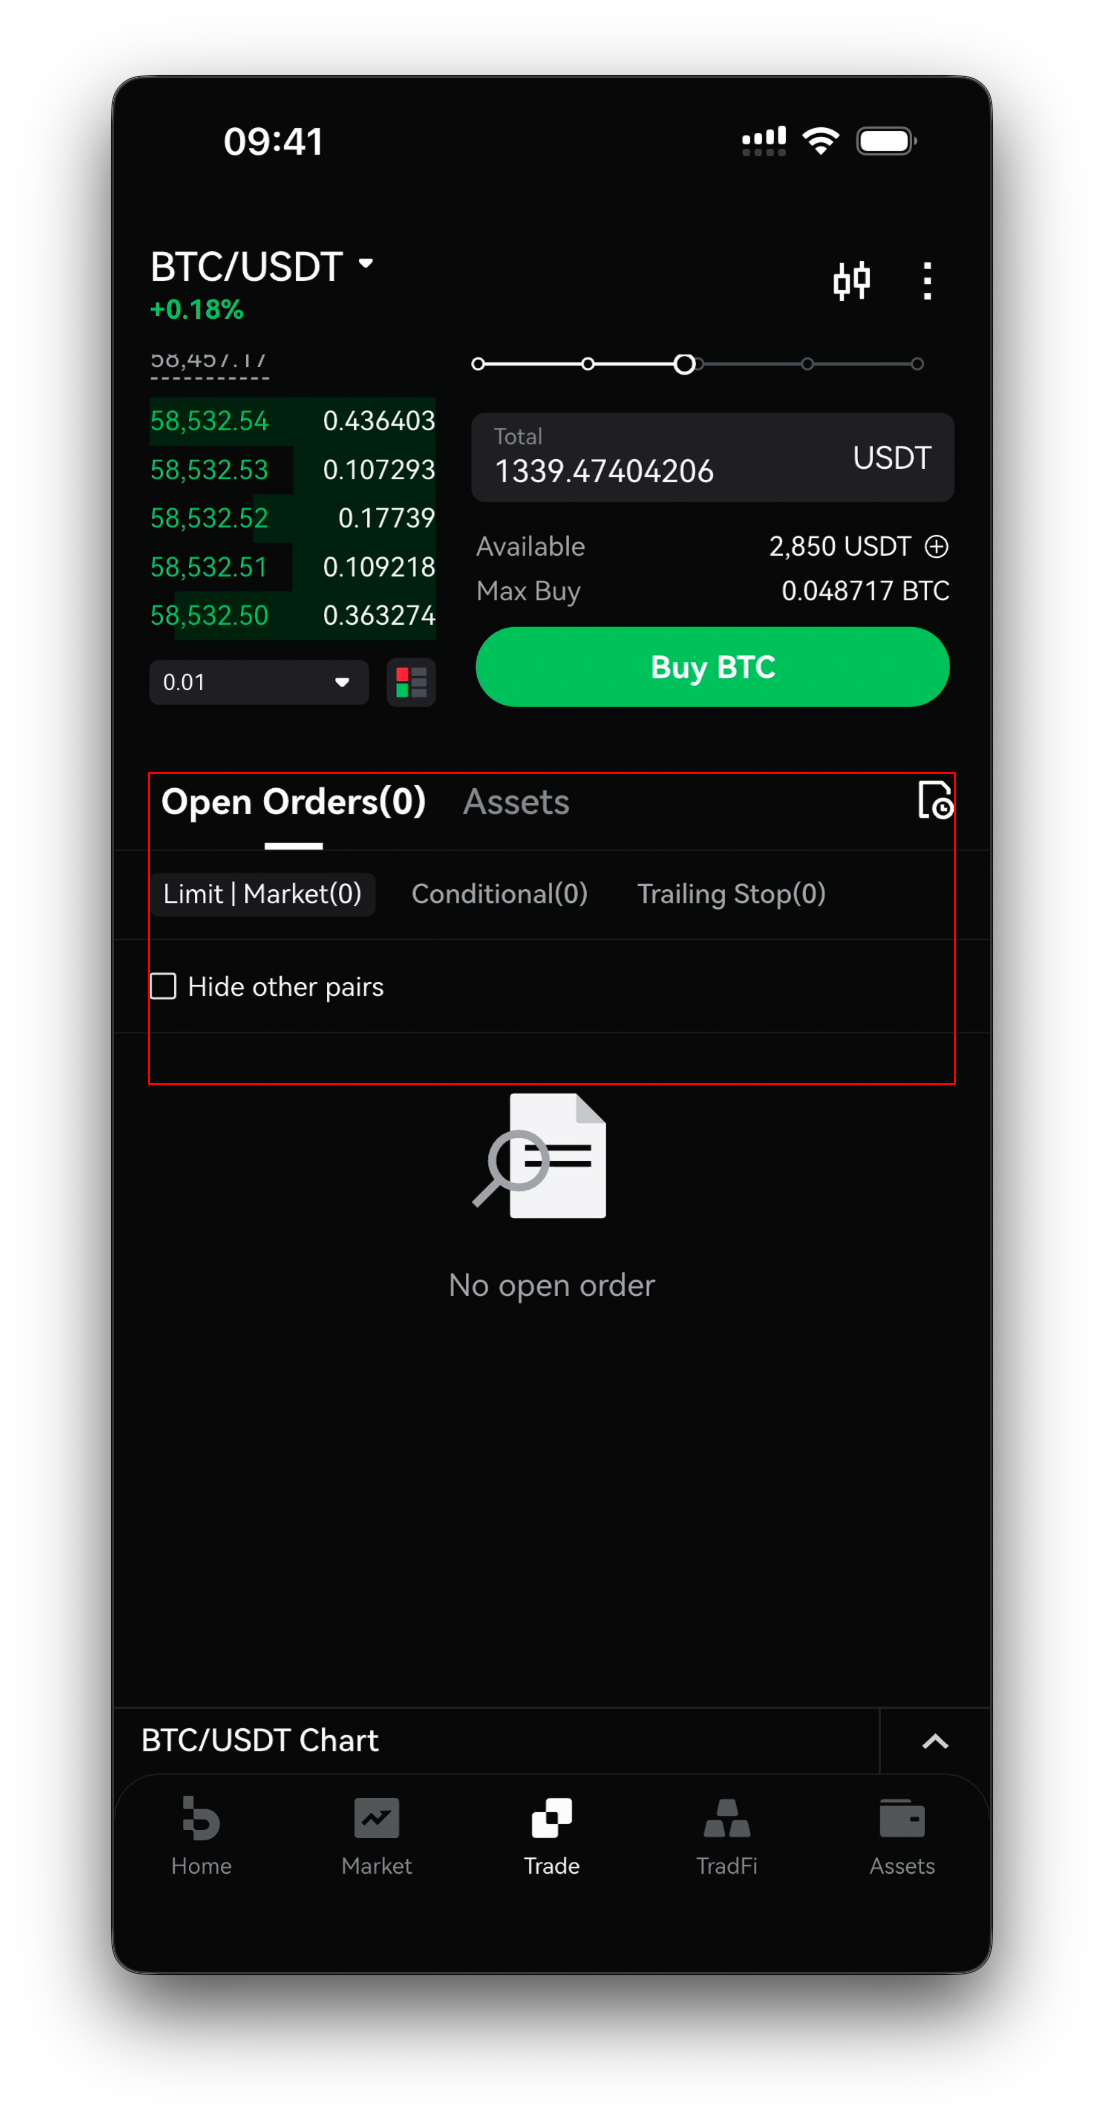
Below the panel, switch between Open Orders and Assets. Unfilled orders appear under Limit/Market, Conditional or Trailing Stop, where you can review or cancel them.
Part 2 — Futures trading (USDT-M perpetual)
Step 6 · Switch to Futures and fund it
At the top of the trade screen tap the Futures tab (the contract shows as Perpetual). Tap the + next to Available to transfer funds into your futures account. The header shows the Funding Rate / Countdown.
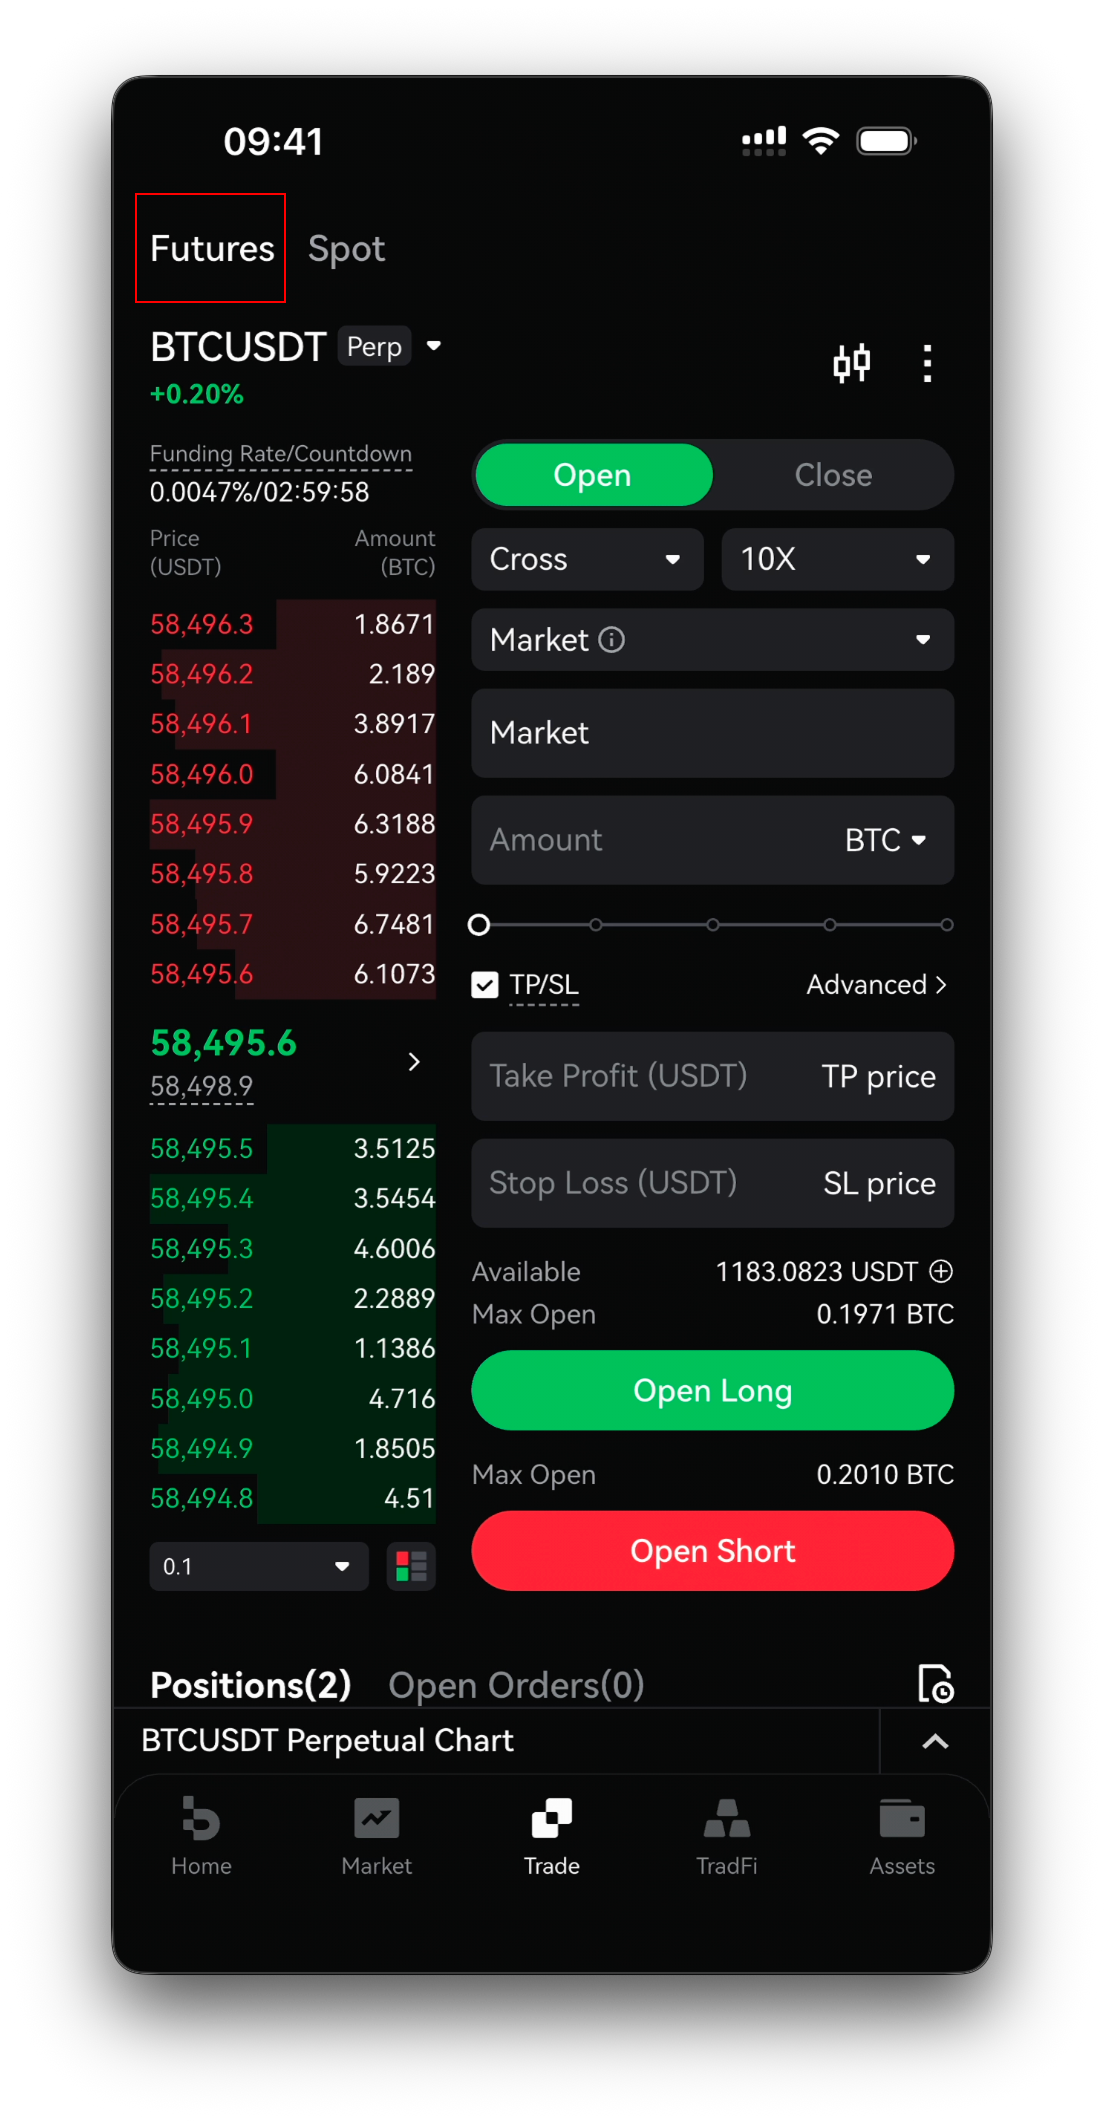
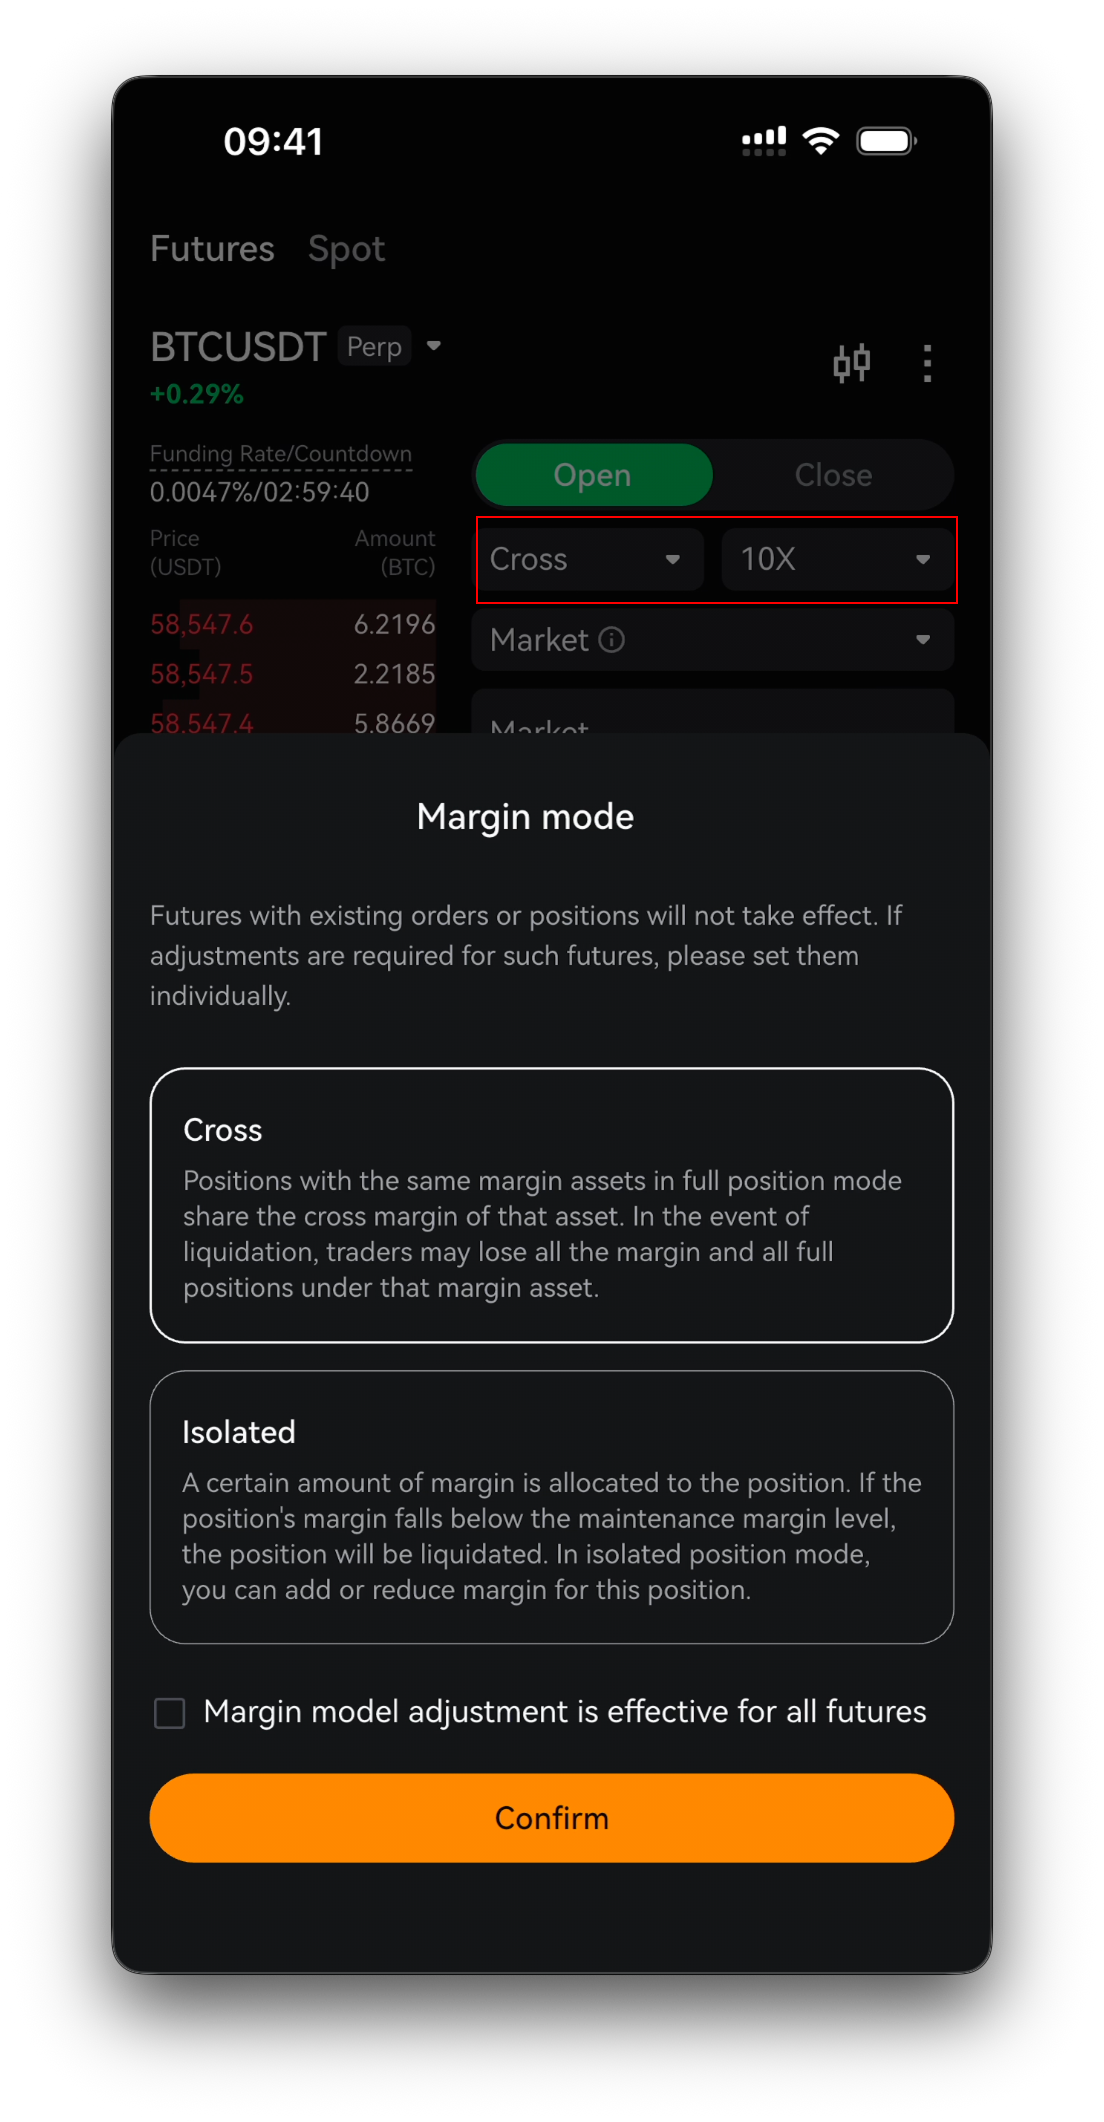
Step 7 · Set margin mode and leverage
Tap the margin-mode button (Cross by default) to choose Cross or Isolated, then tap the leverage button (e.g. 20X) to set your leverage. Higher leverage increases both potential profit and liquidation risk.
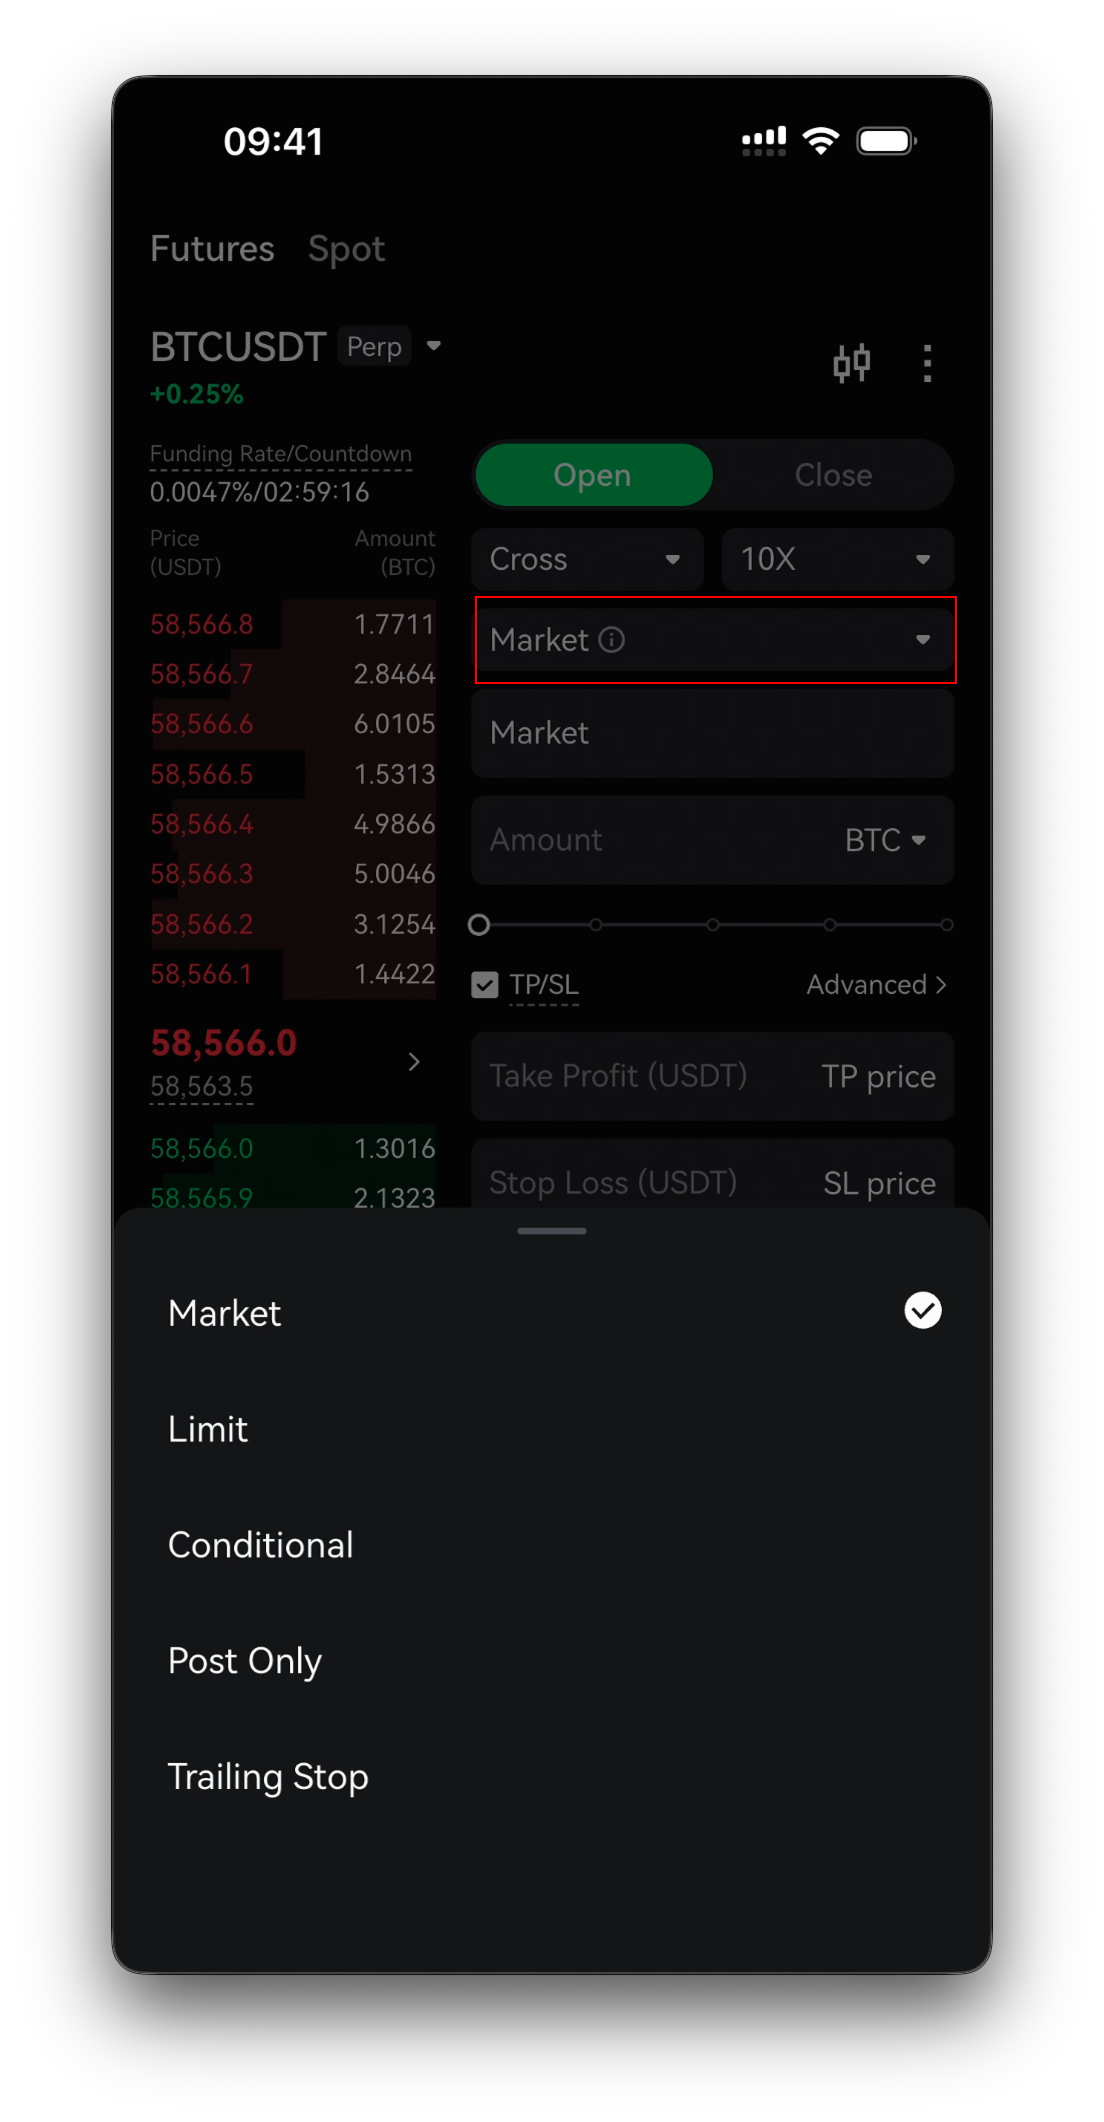
Step 8 · Enter your order (with optional TP/SL)
Under the Open tab, pick an order type (Market / Limit / Conditional) and enter your Size, or use the slider. Tick TP/SL to add a Take Profit and Stop Loss price; tap Advanced for more options.
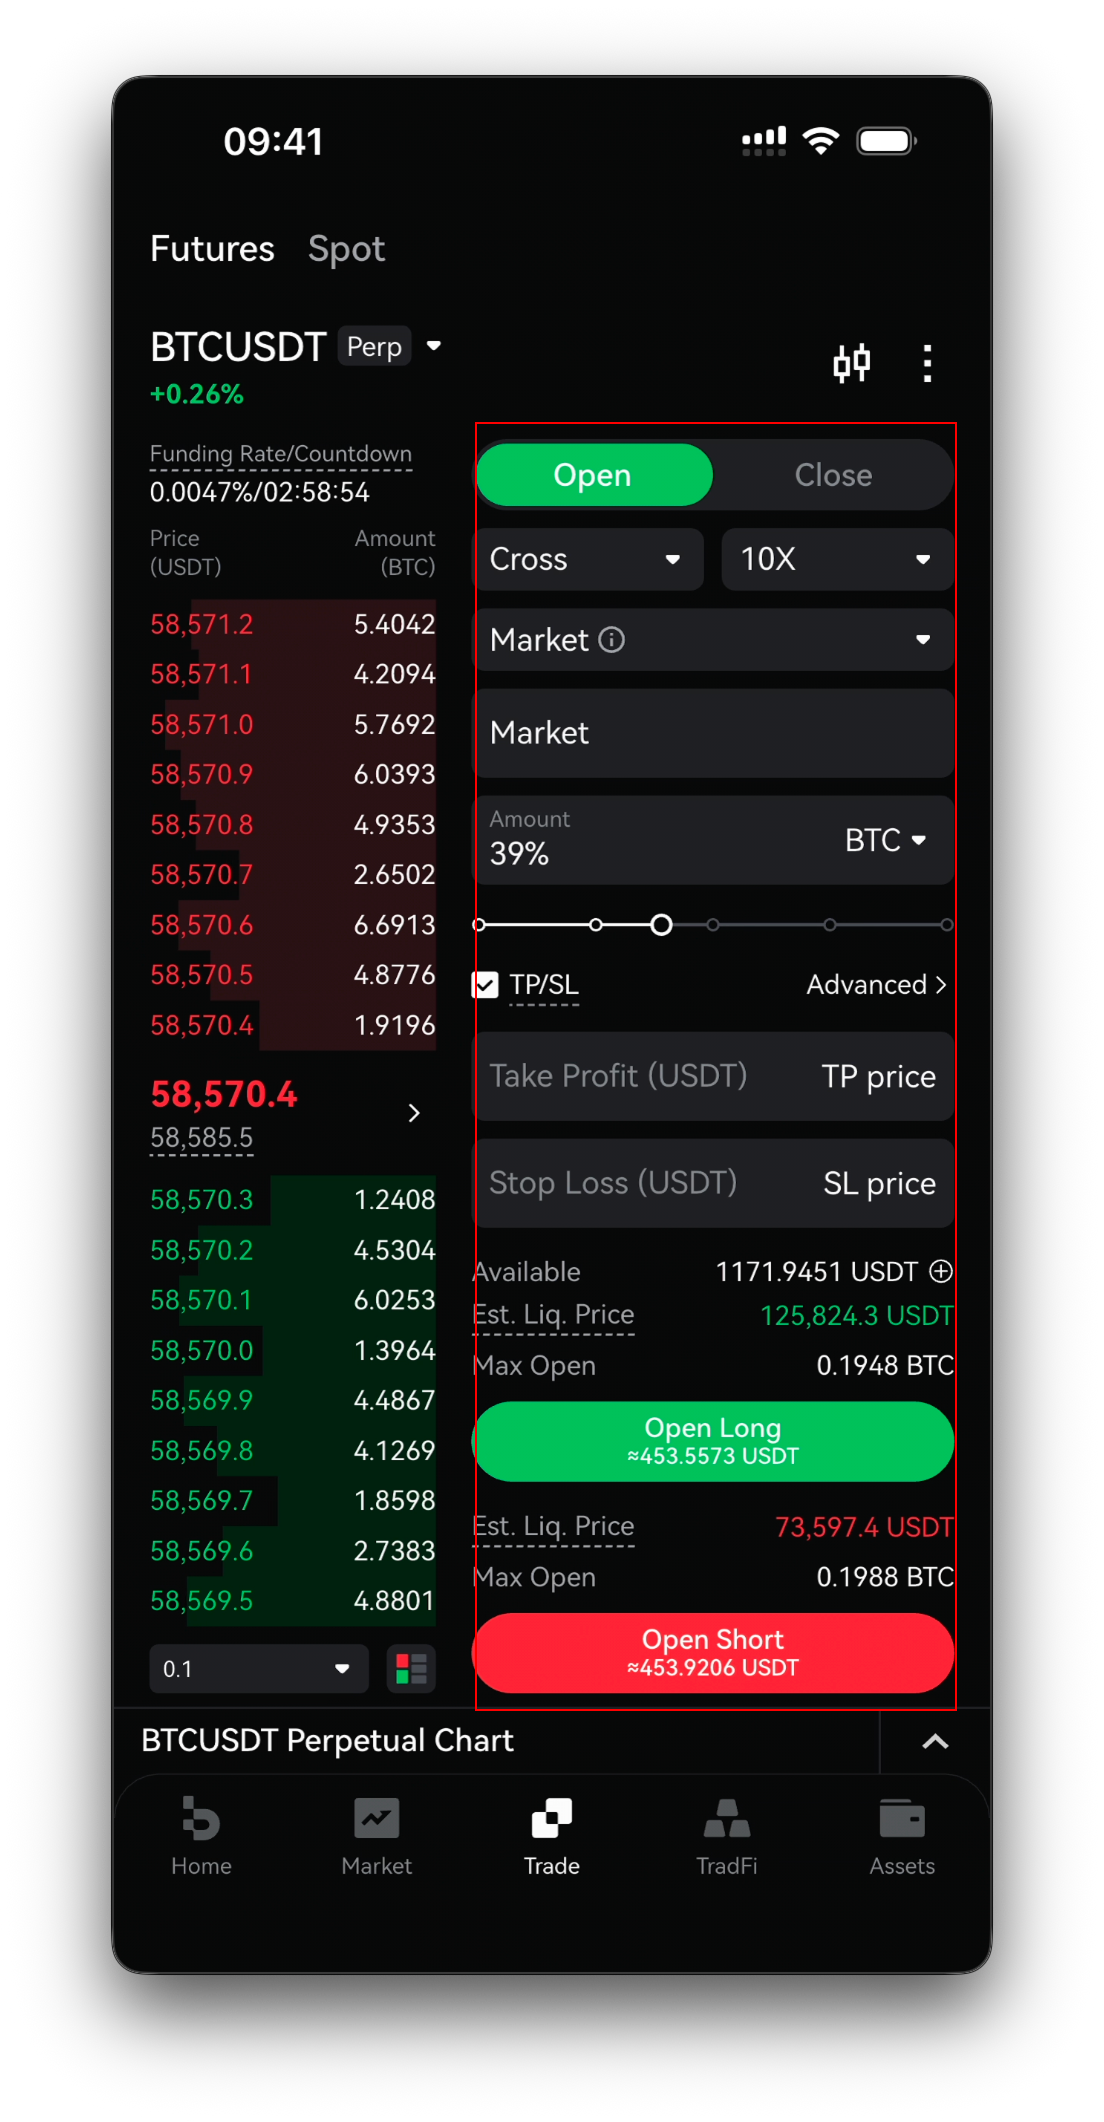
Step 9 · Open Long or Open Short
Tap Open Long (green, betting the price rises) or Open Short (red, betting it falls). Before confirming, check Available, Max Long / Max Short and the estimated liquidation price.
Step 10 · Manage and close positions
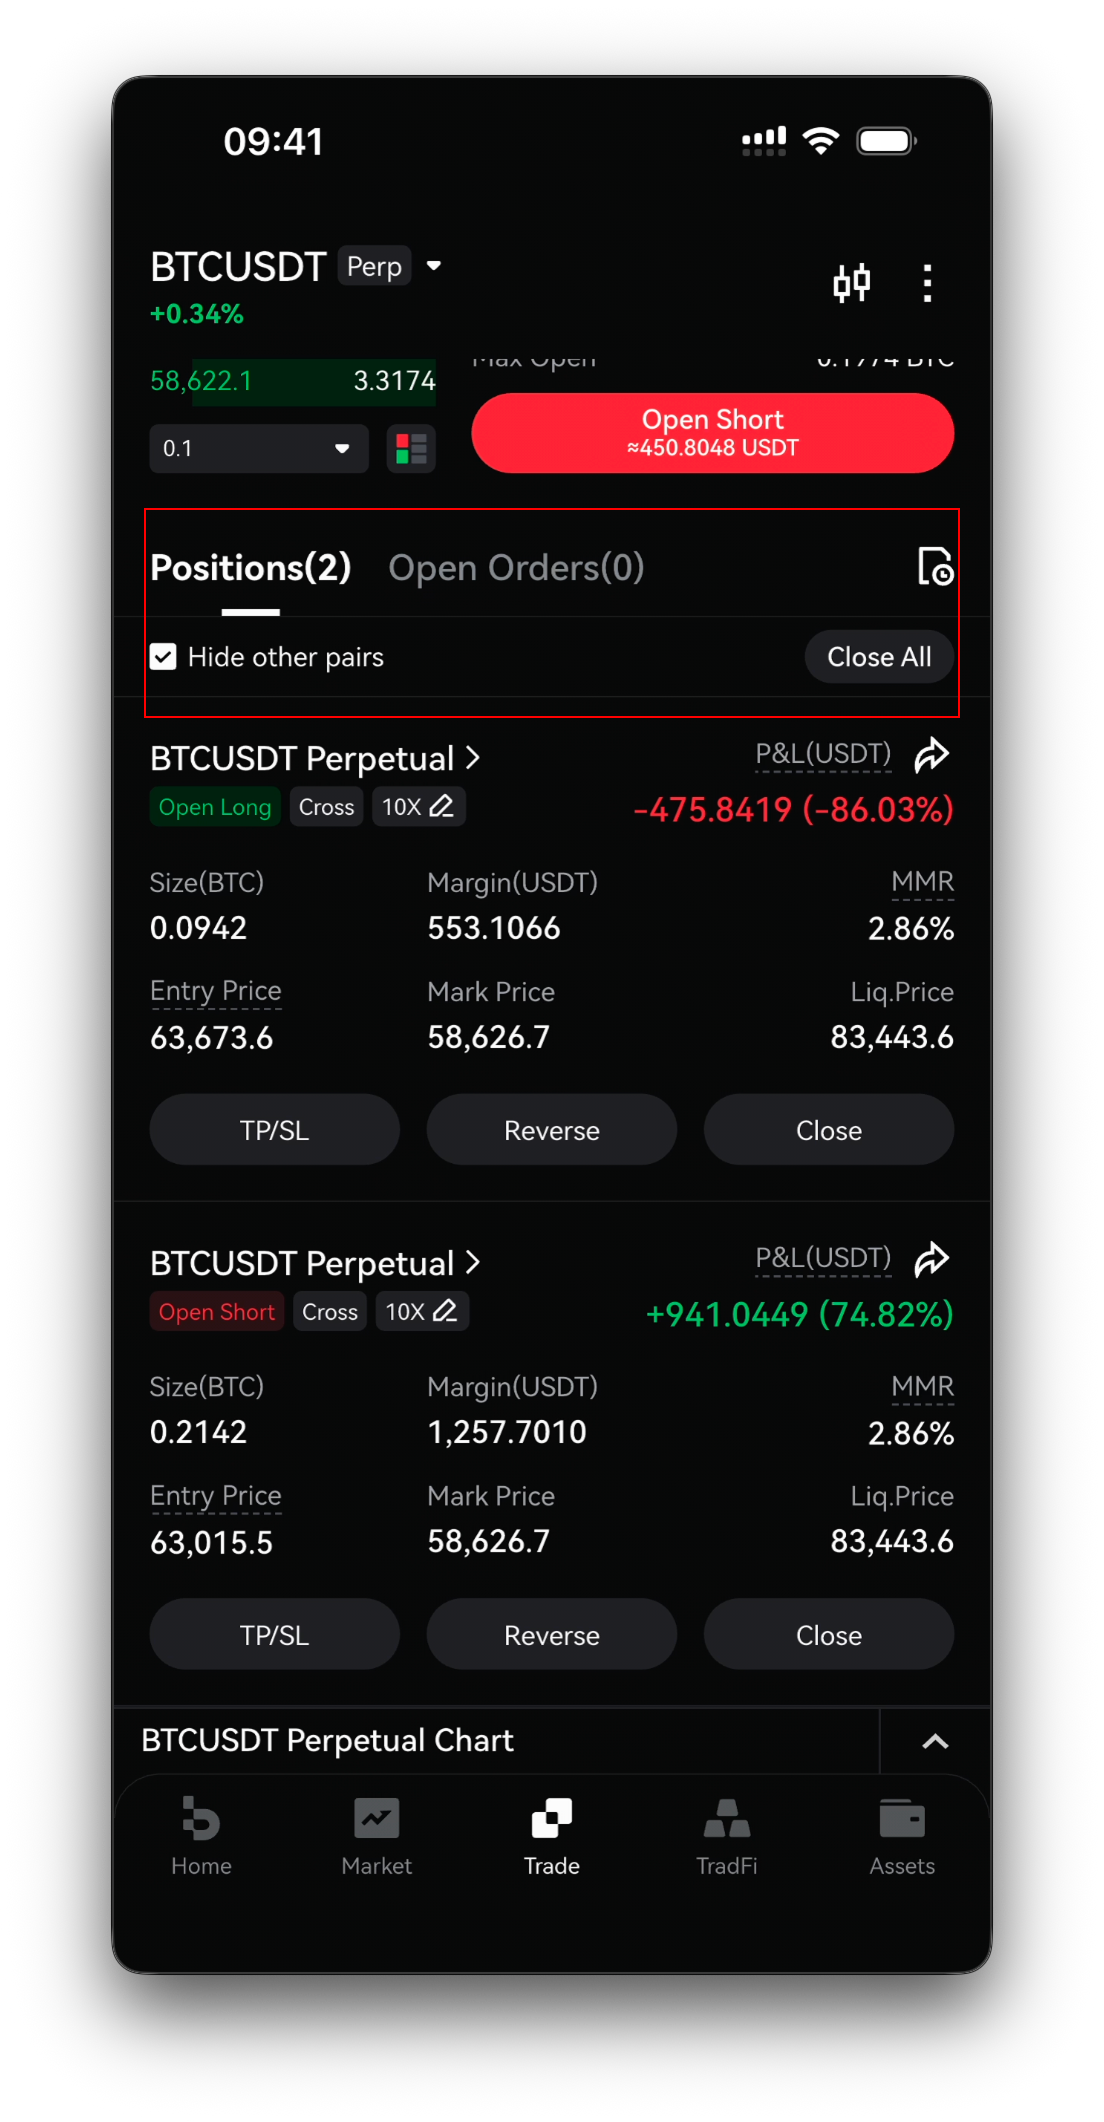
At the bottom, switch between Position and Open Orders to track your trades. Watch your margin to avoid liquidation, and use the Close tab to exit a position.
Safety and risk reminders
Never risk more than you can afford to lose, and be especially careful with leverage — a small adverse move can liquidate a futures position. Use TP/SL to manage risk and keep enough margin in your account. Double-check the pair, direction and amount before you confirm any order. Bitbase will never ask for your password or verification codes.
This is an official Bitbase product guide for educational and informational purposes only, and is not financial advice. Interface details, fees, leverage and limits can change; always rely on the live Bitbase app. Written June 2026.