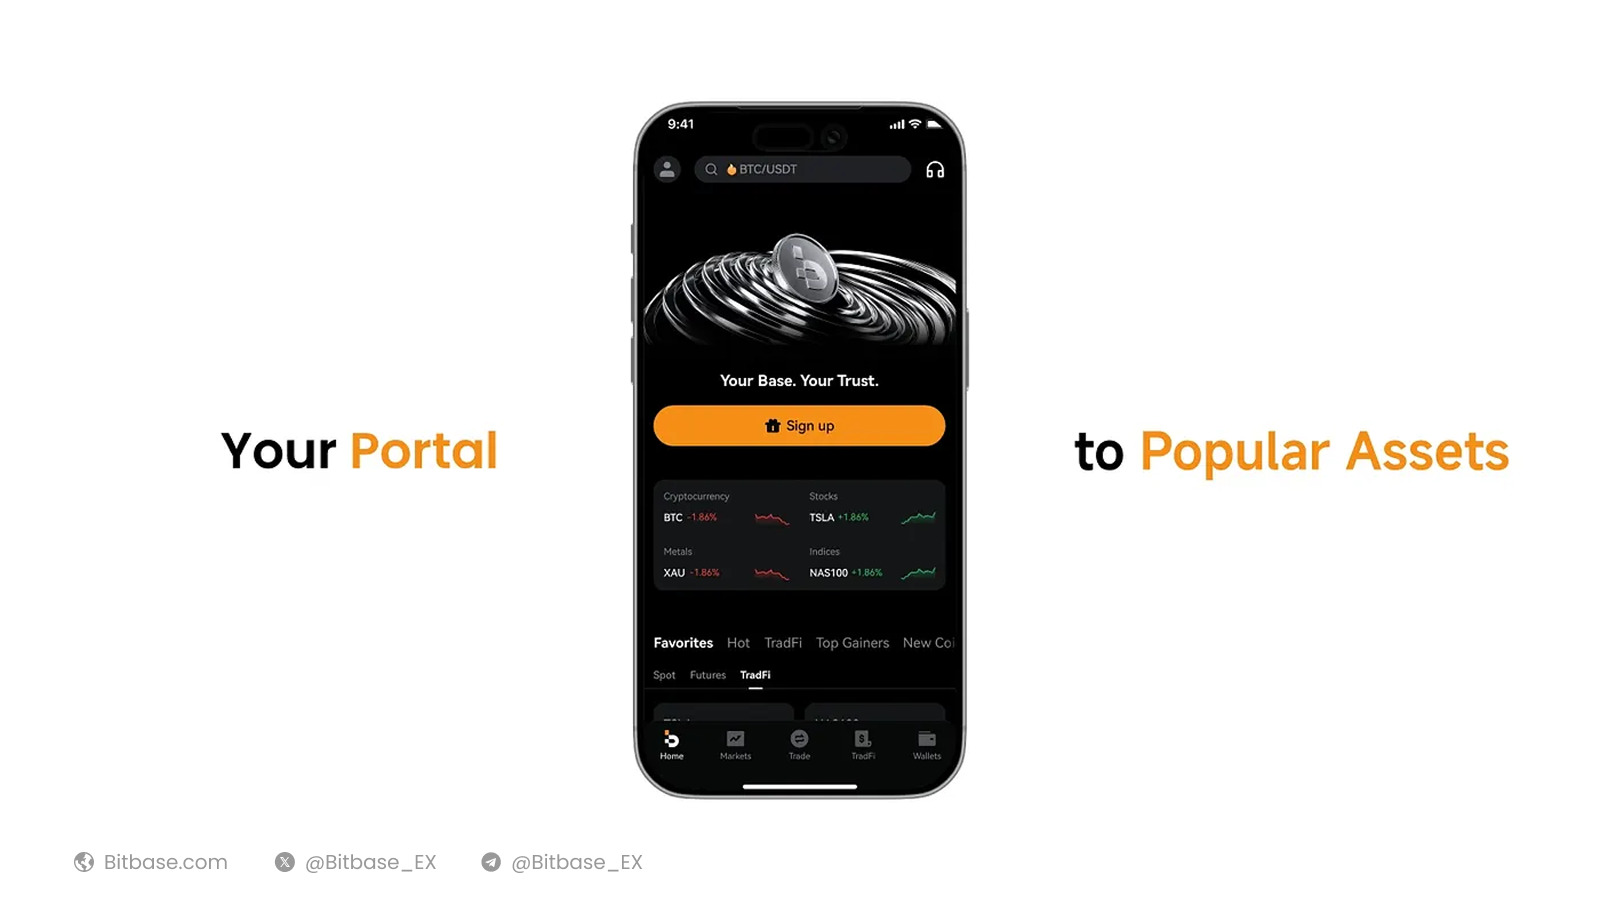
A step-by-step guide to funding your Bitbase account and withdrawing crypto on the Bitbase web platform (bitbase.com). This guide uses USDT on the TRC20 (TRON) network as the example.
Before you start
Bitbase Web runs entirely in your browser — go to bitbase.com and log in; there is nothing to install. If you haven't already, complete identity verification, as it raises your withdrawal limit (up to 500,000 USDT per day). Have the sending wallet (or the platform you're transferring from) ready, and always make sure the network matches on both sides.
Part 1 — Deposit crypto
Step 1 · Log in and open Crypto Deposit
Go to bitbase.com and log in to your account. In the top navigation bar, click Deposit. You will land on the Crypto Deposit page.

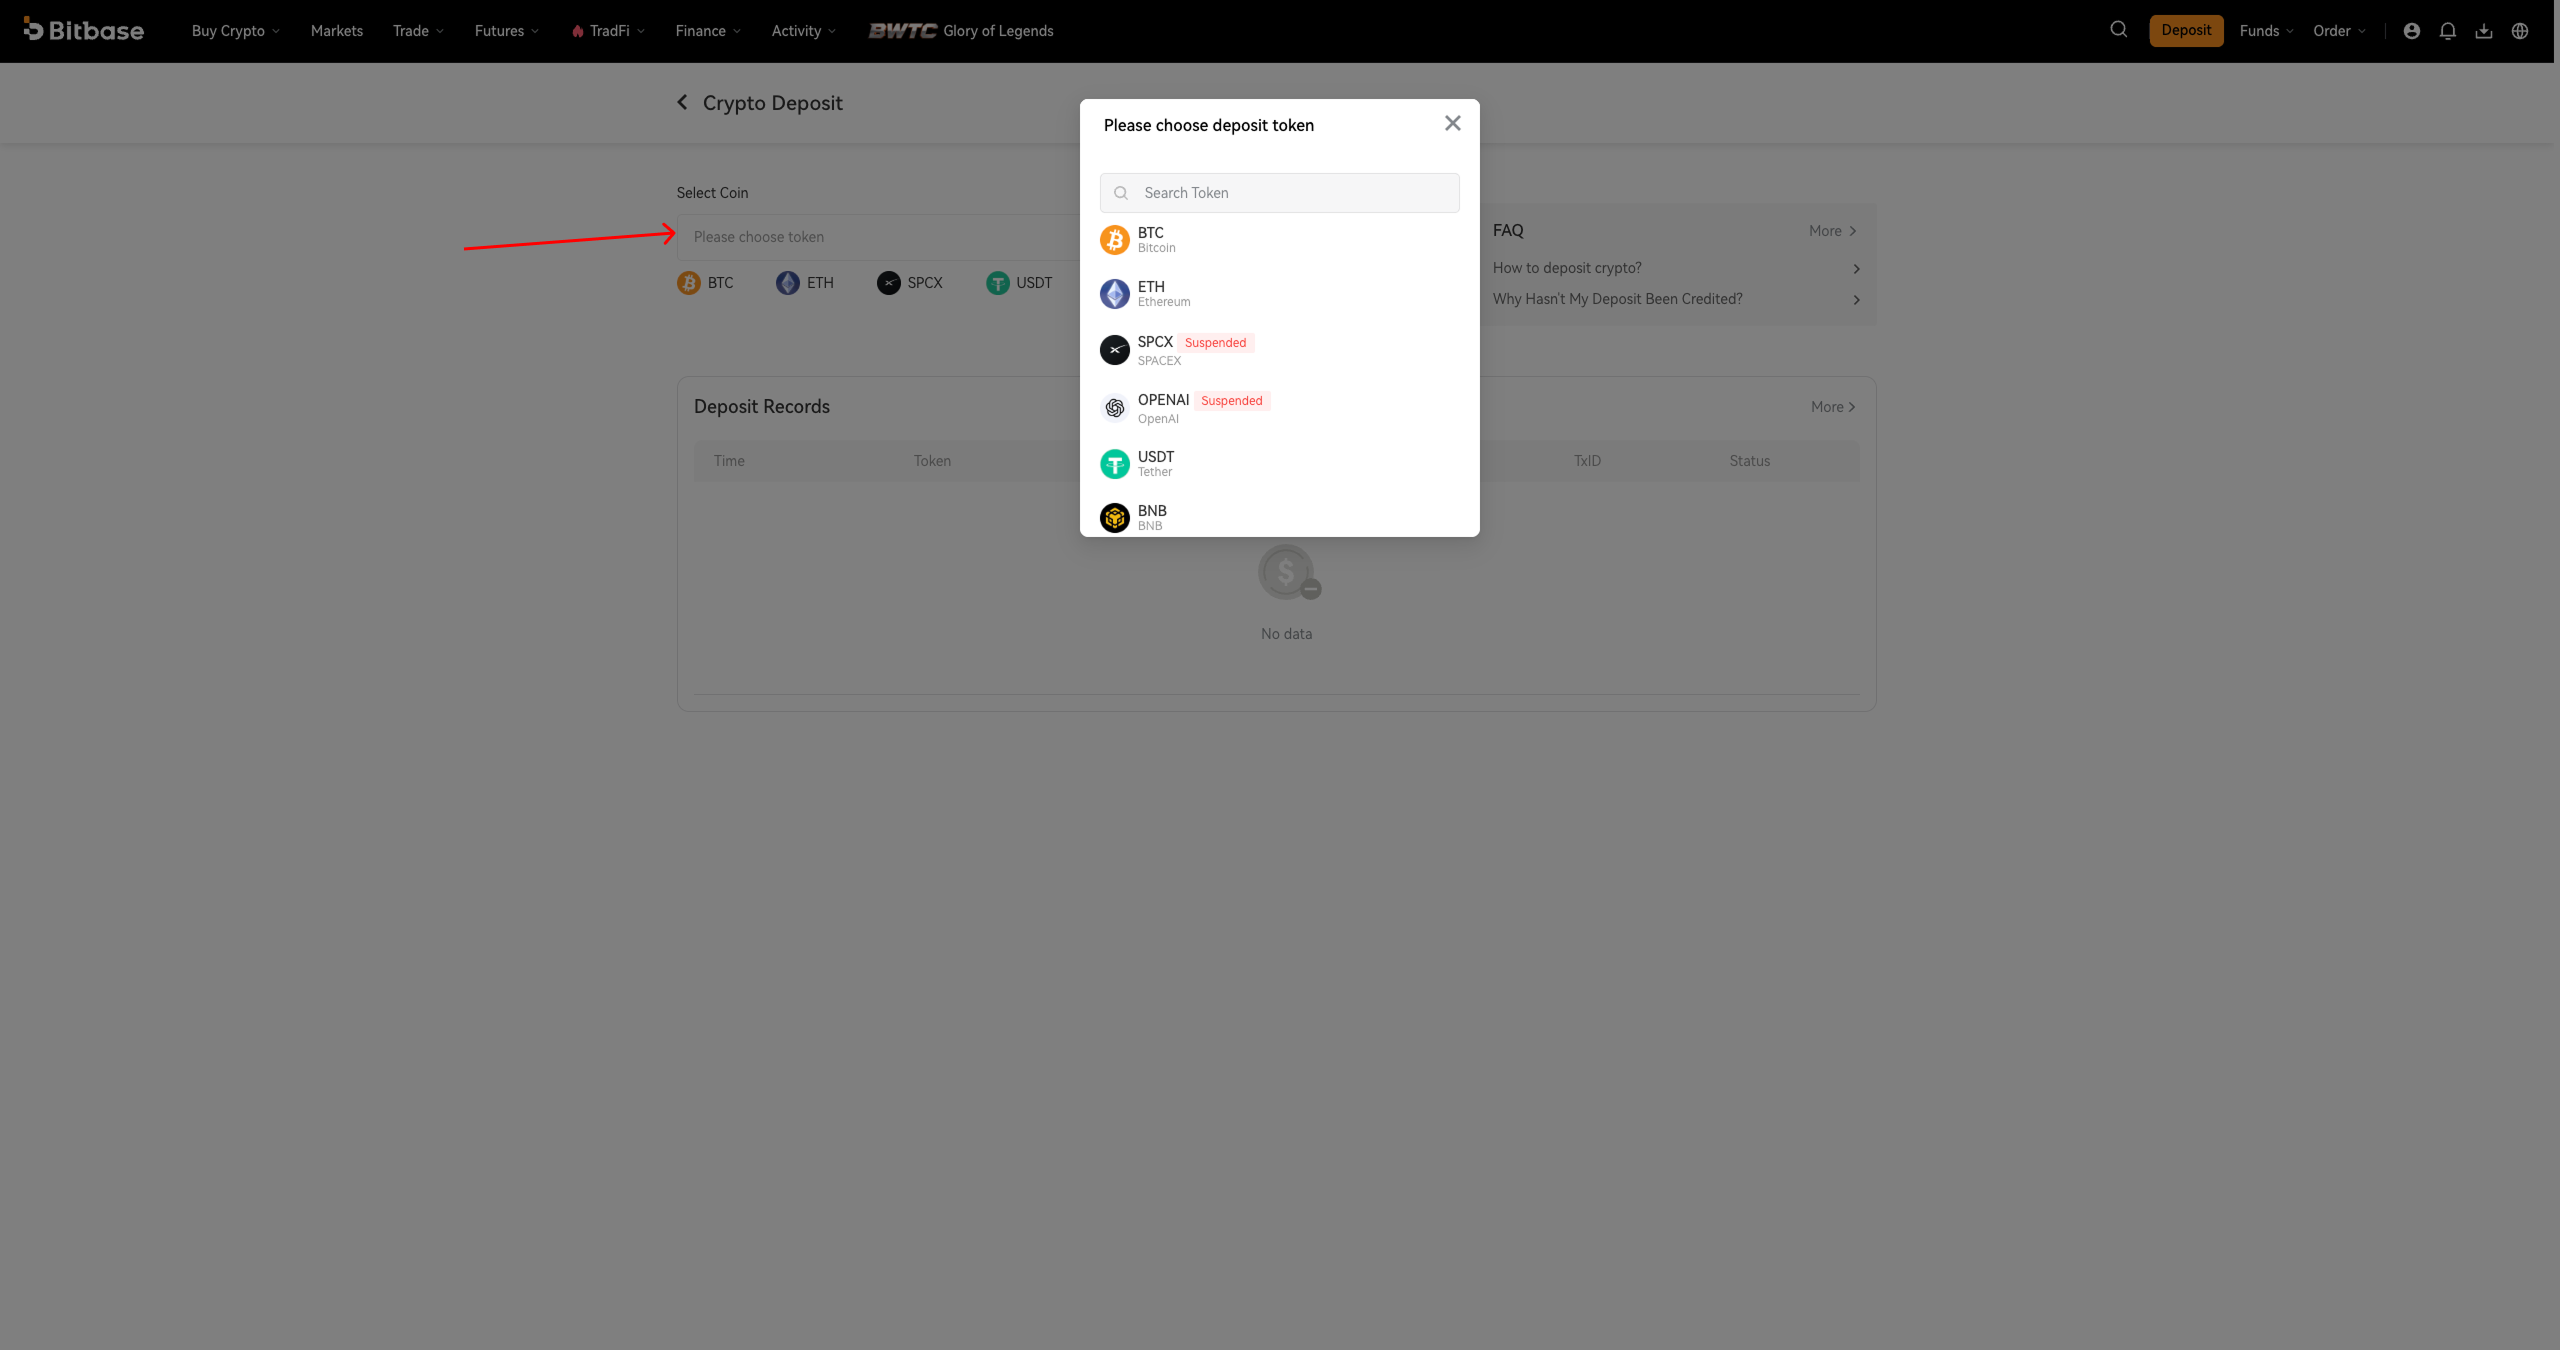
Step 2 · Select the coin to deposit
Under Select Coin, choose the cryptocurrency you want to deposit — for example USDT. You can pick from the quick list (BTC, ETH, SPCX, USDT, OPENAI) or search for the token in the dropdown.
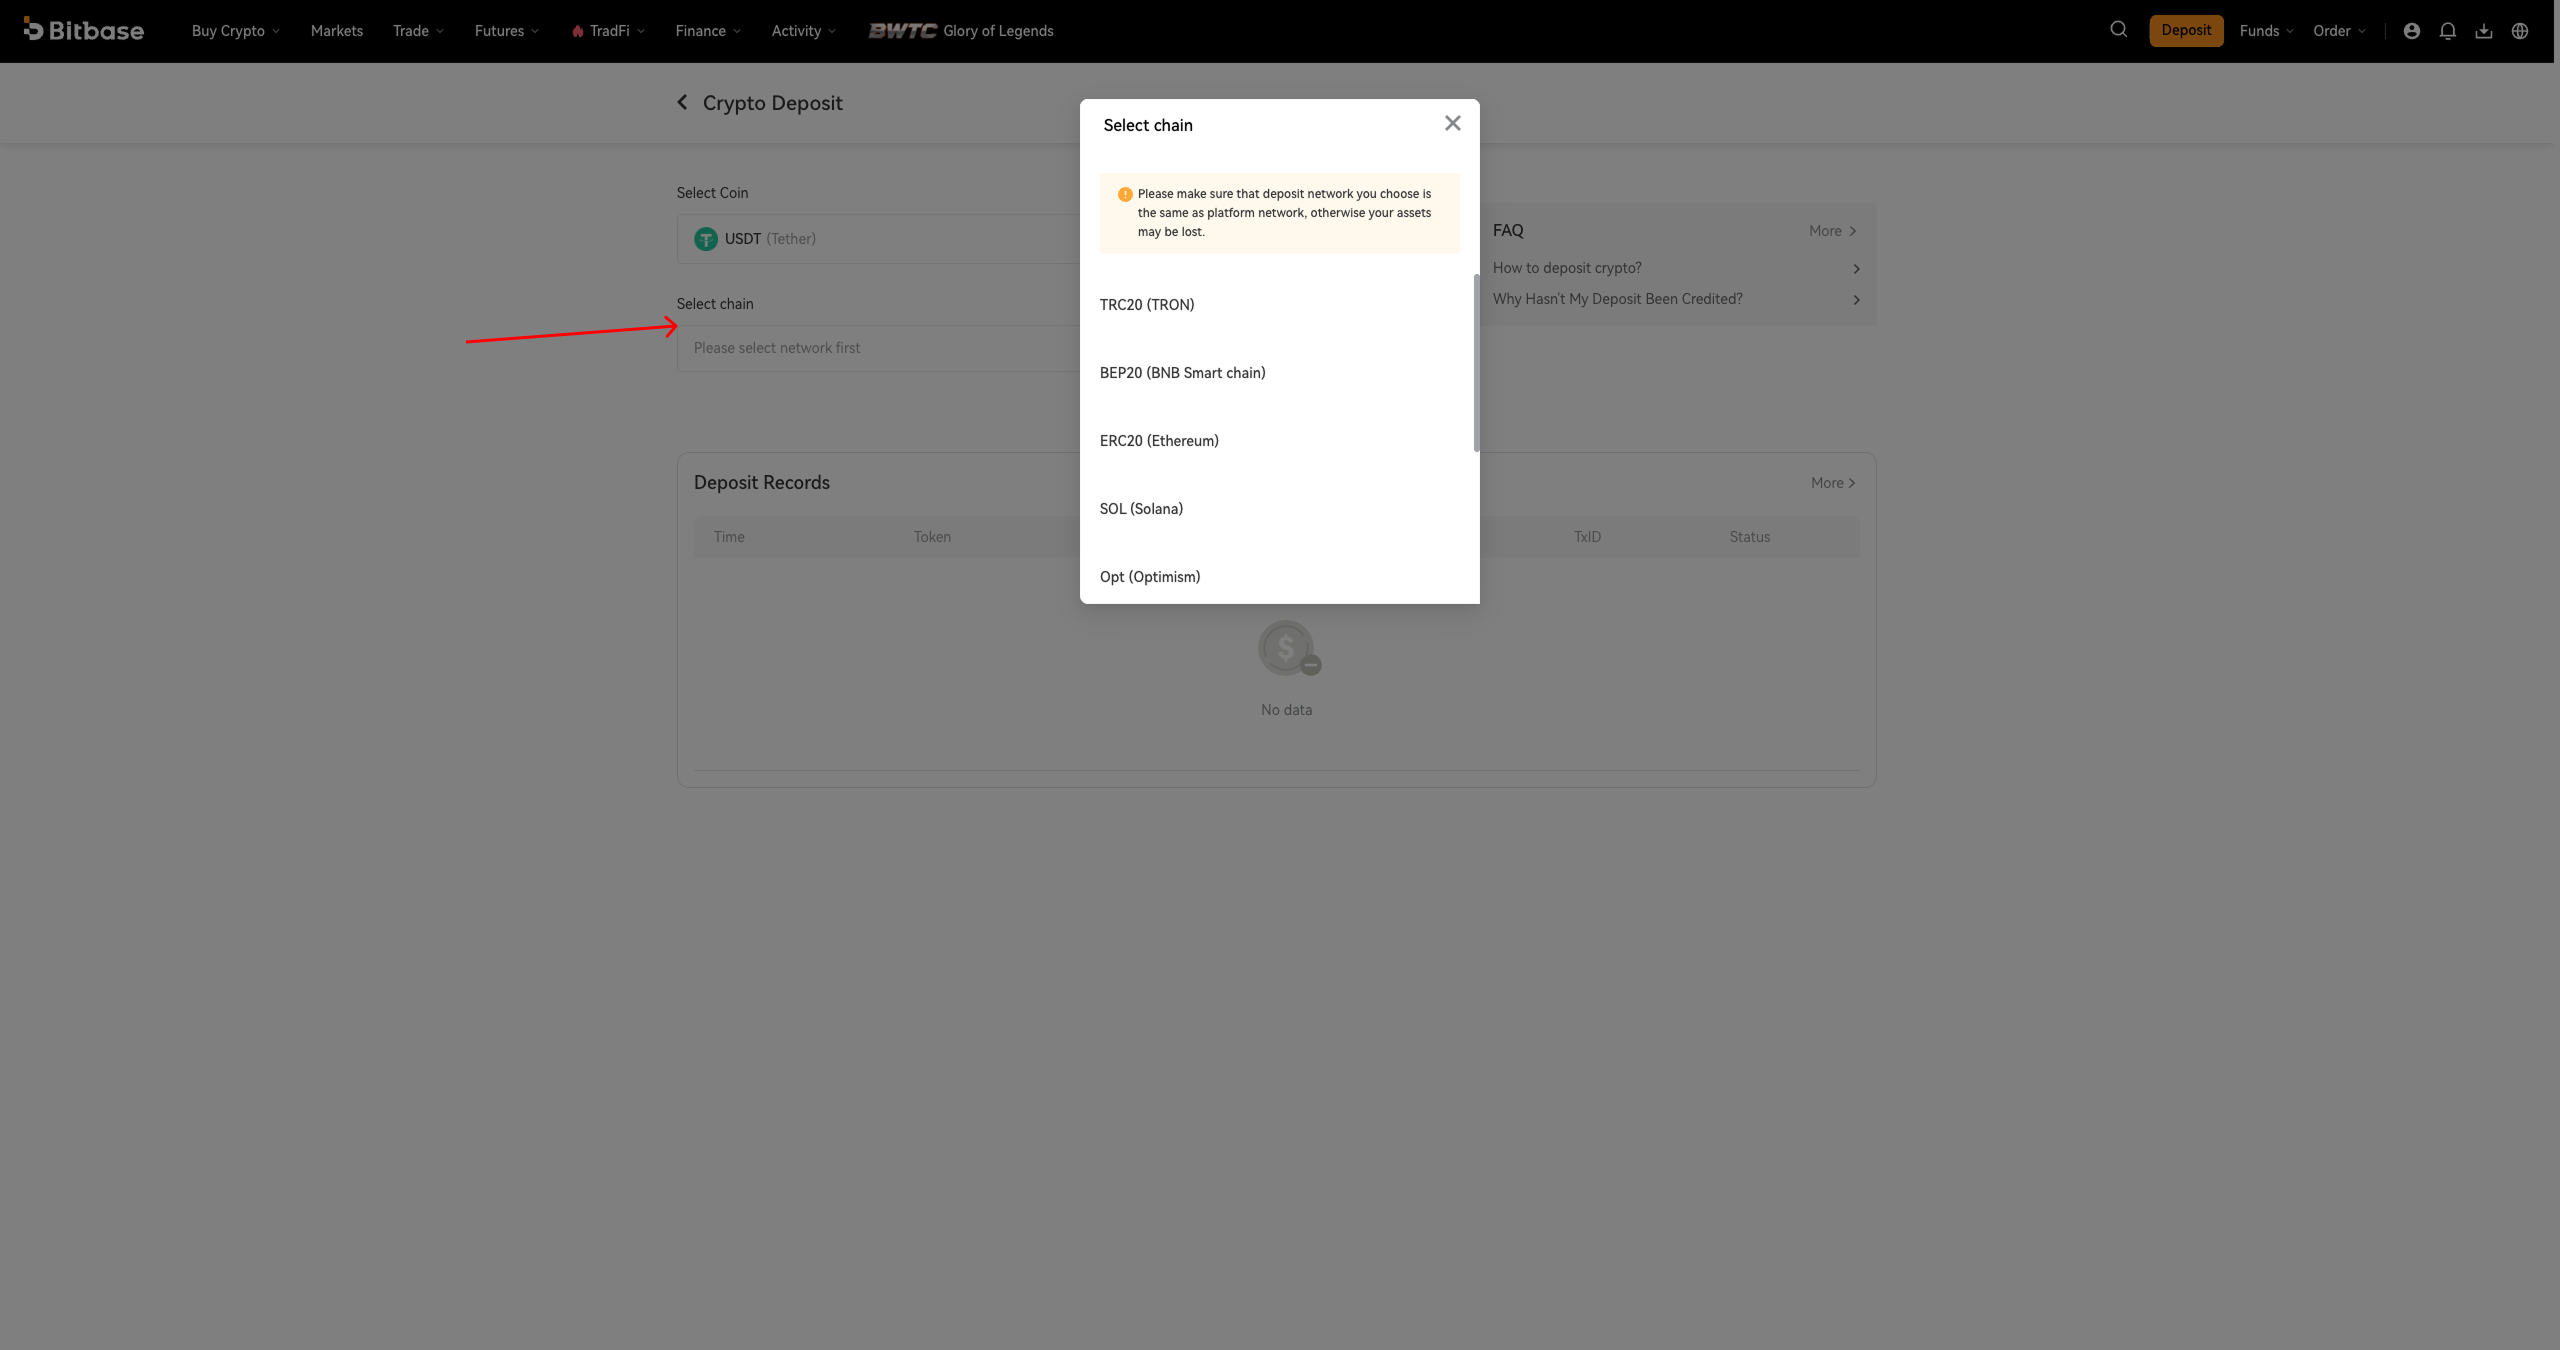
Step 3 · Select the network (chain)
Click Select chain and choose the network — for example TRC20 (TRON), BEP20 (BNB Smart Chain), ERC20 (Ethereum), SOL (Solana), or Opt (Optimism). This step is critical: the network you choose must match the network used by the wallet or platform sending the funds. If the networks don't match, your assets may be lost.
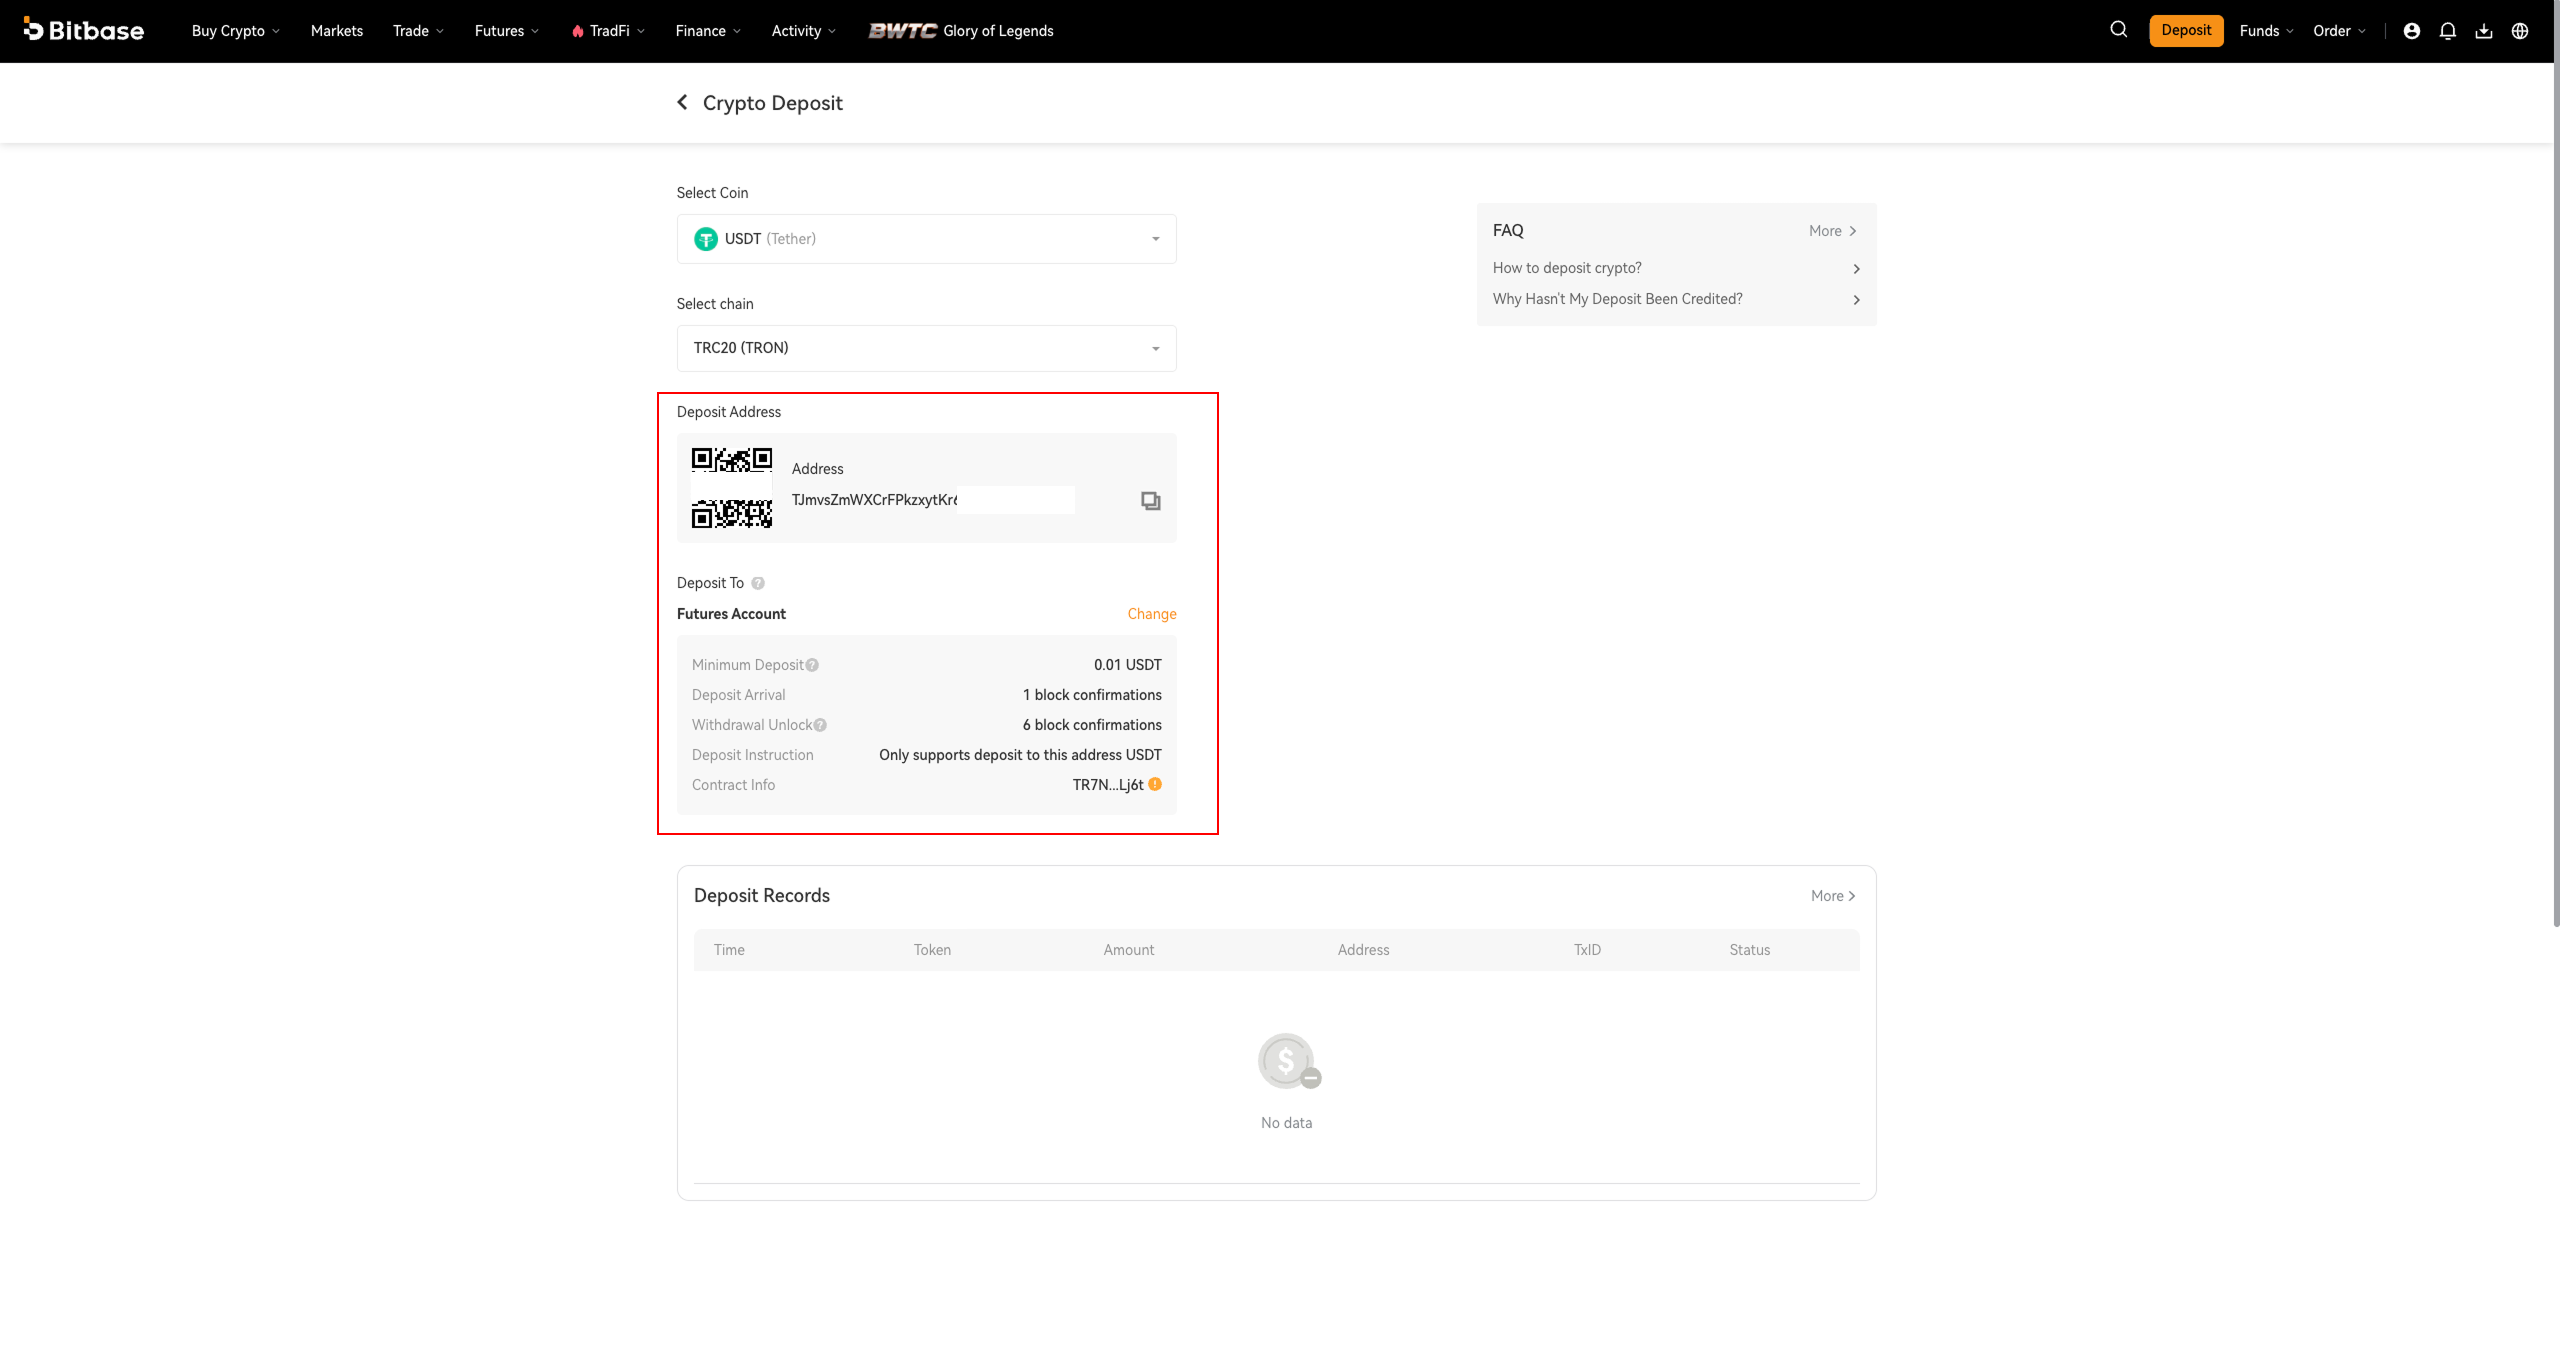
Step 4 · Choose the receiving account and copy your address
Under Deposit To, keep the default or click Change to choose Spot Account or Futures Account — your deposit is automatically credited to the selected account on arrival. Then copy the Deposit Address (or scan the QR code). Note the details: minimum deposit 0.01 USDT, arrival after 1 block confirmation, and withdrawal unlock after 6 confirmations.
Step 5 · Send from your external wallet and check your balance
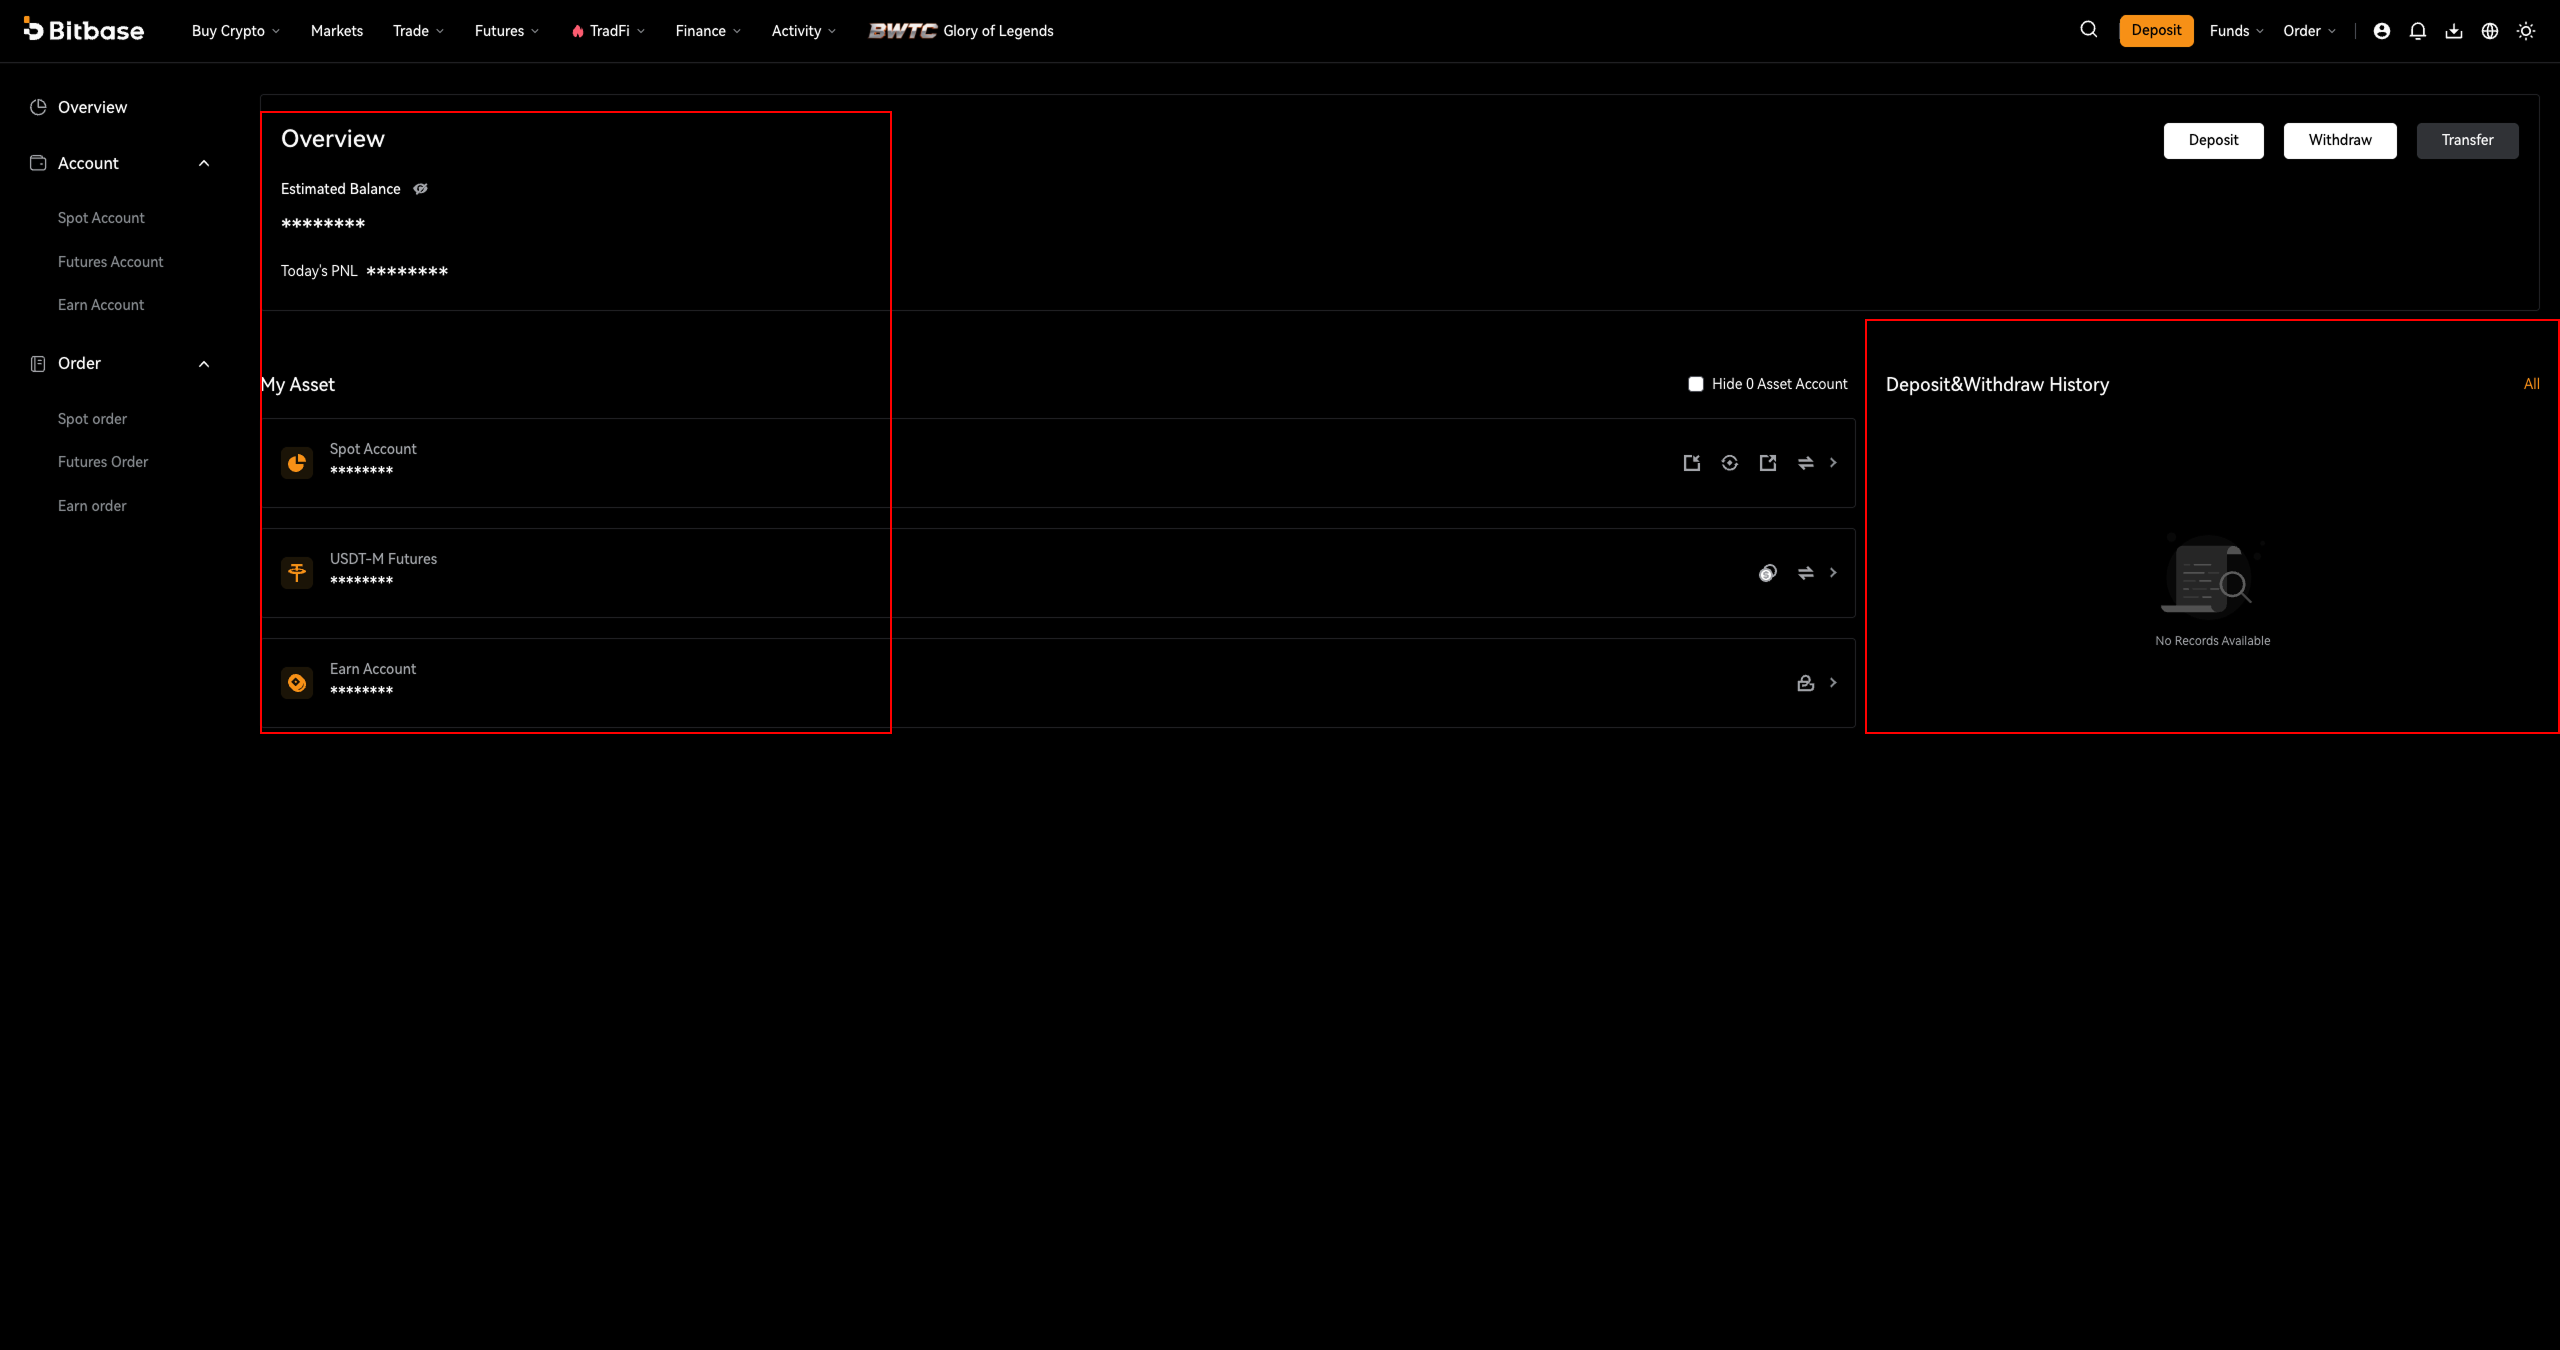
Paste the copied address into your sending wallet or platform, confirm you selected the same network, and send. Once the blockchain confirms the transaction, your funds appear under Funds → Overview, in the account you chose.
Part 2 — Withdraw crypto
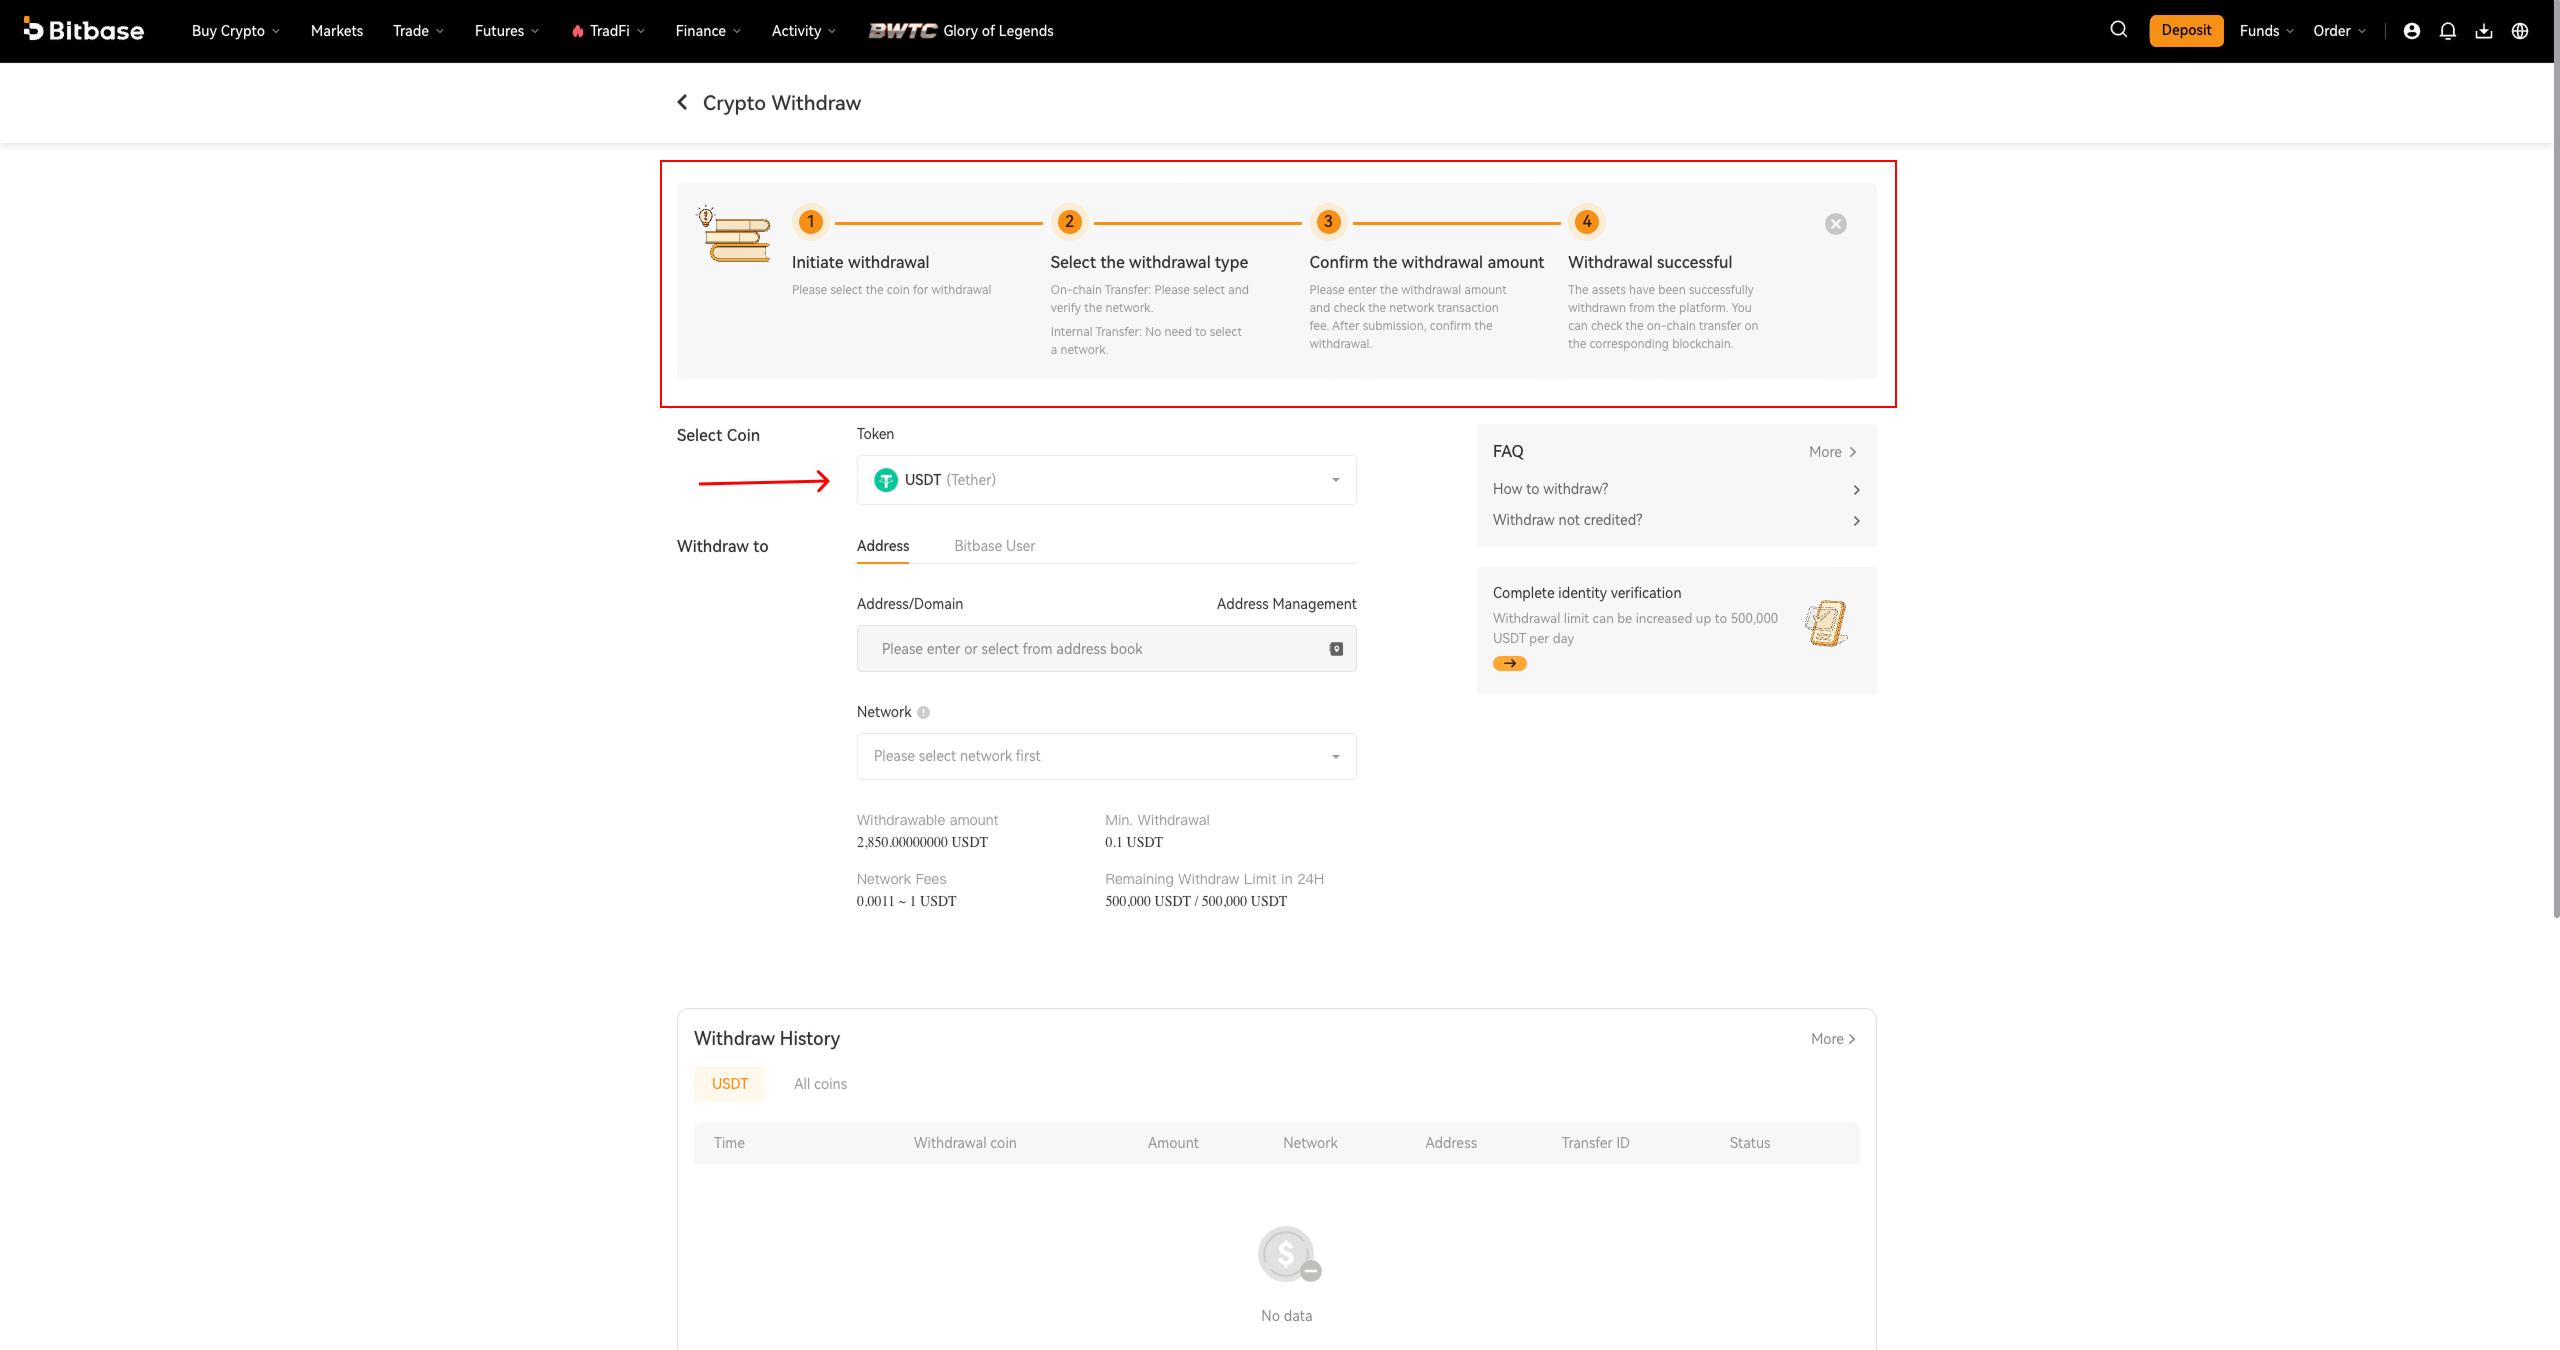
Step 1 · Open Crypto Withdraw and select the coin
Go to Funds → Withdraw to open the Crypto Withdraw page. A four-step tracker guides you: Initiate withdrawal → Select the withdrawal type → Confirm the withdrawal amount → Withdrawal successful. Under Select Coin → Token, choose the coin to withdraw — for example USDT.
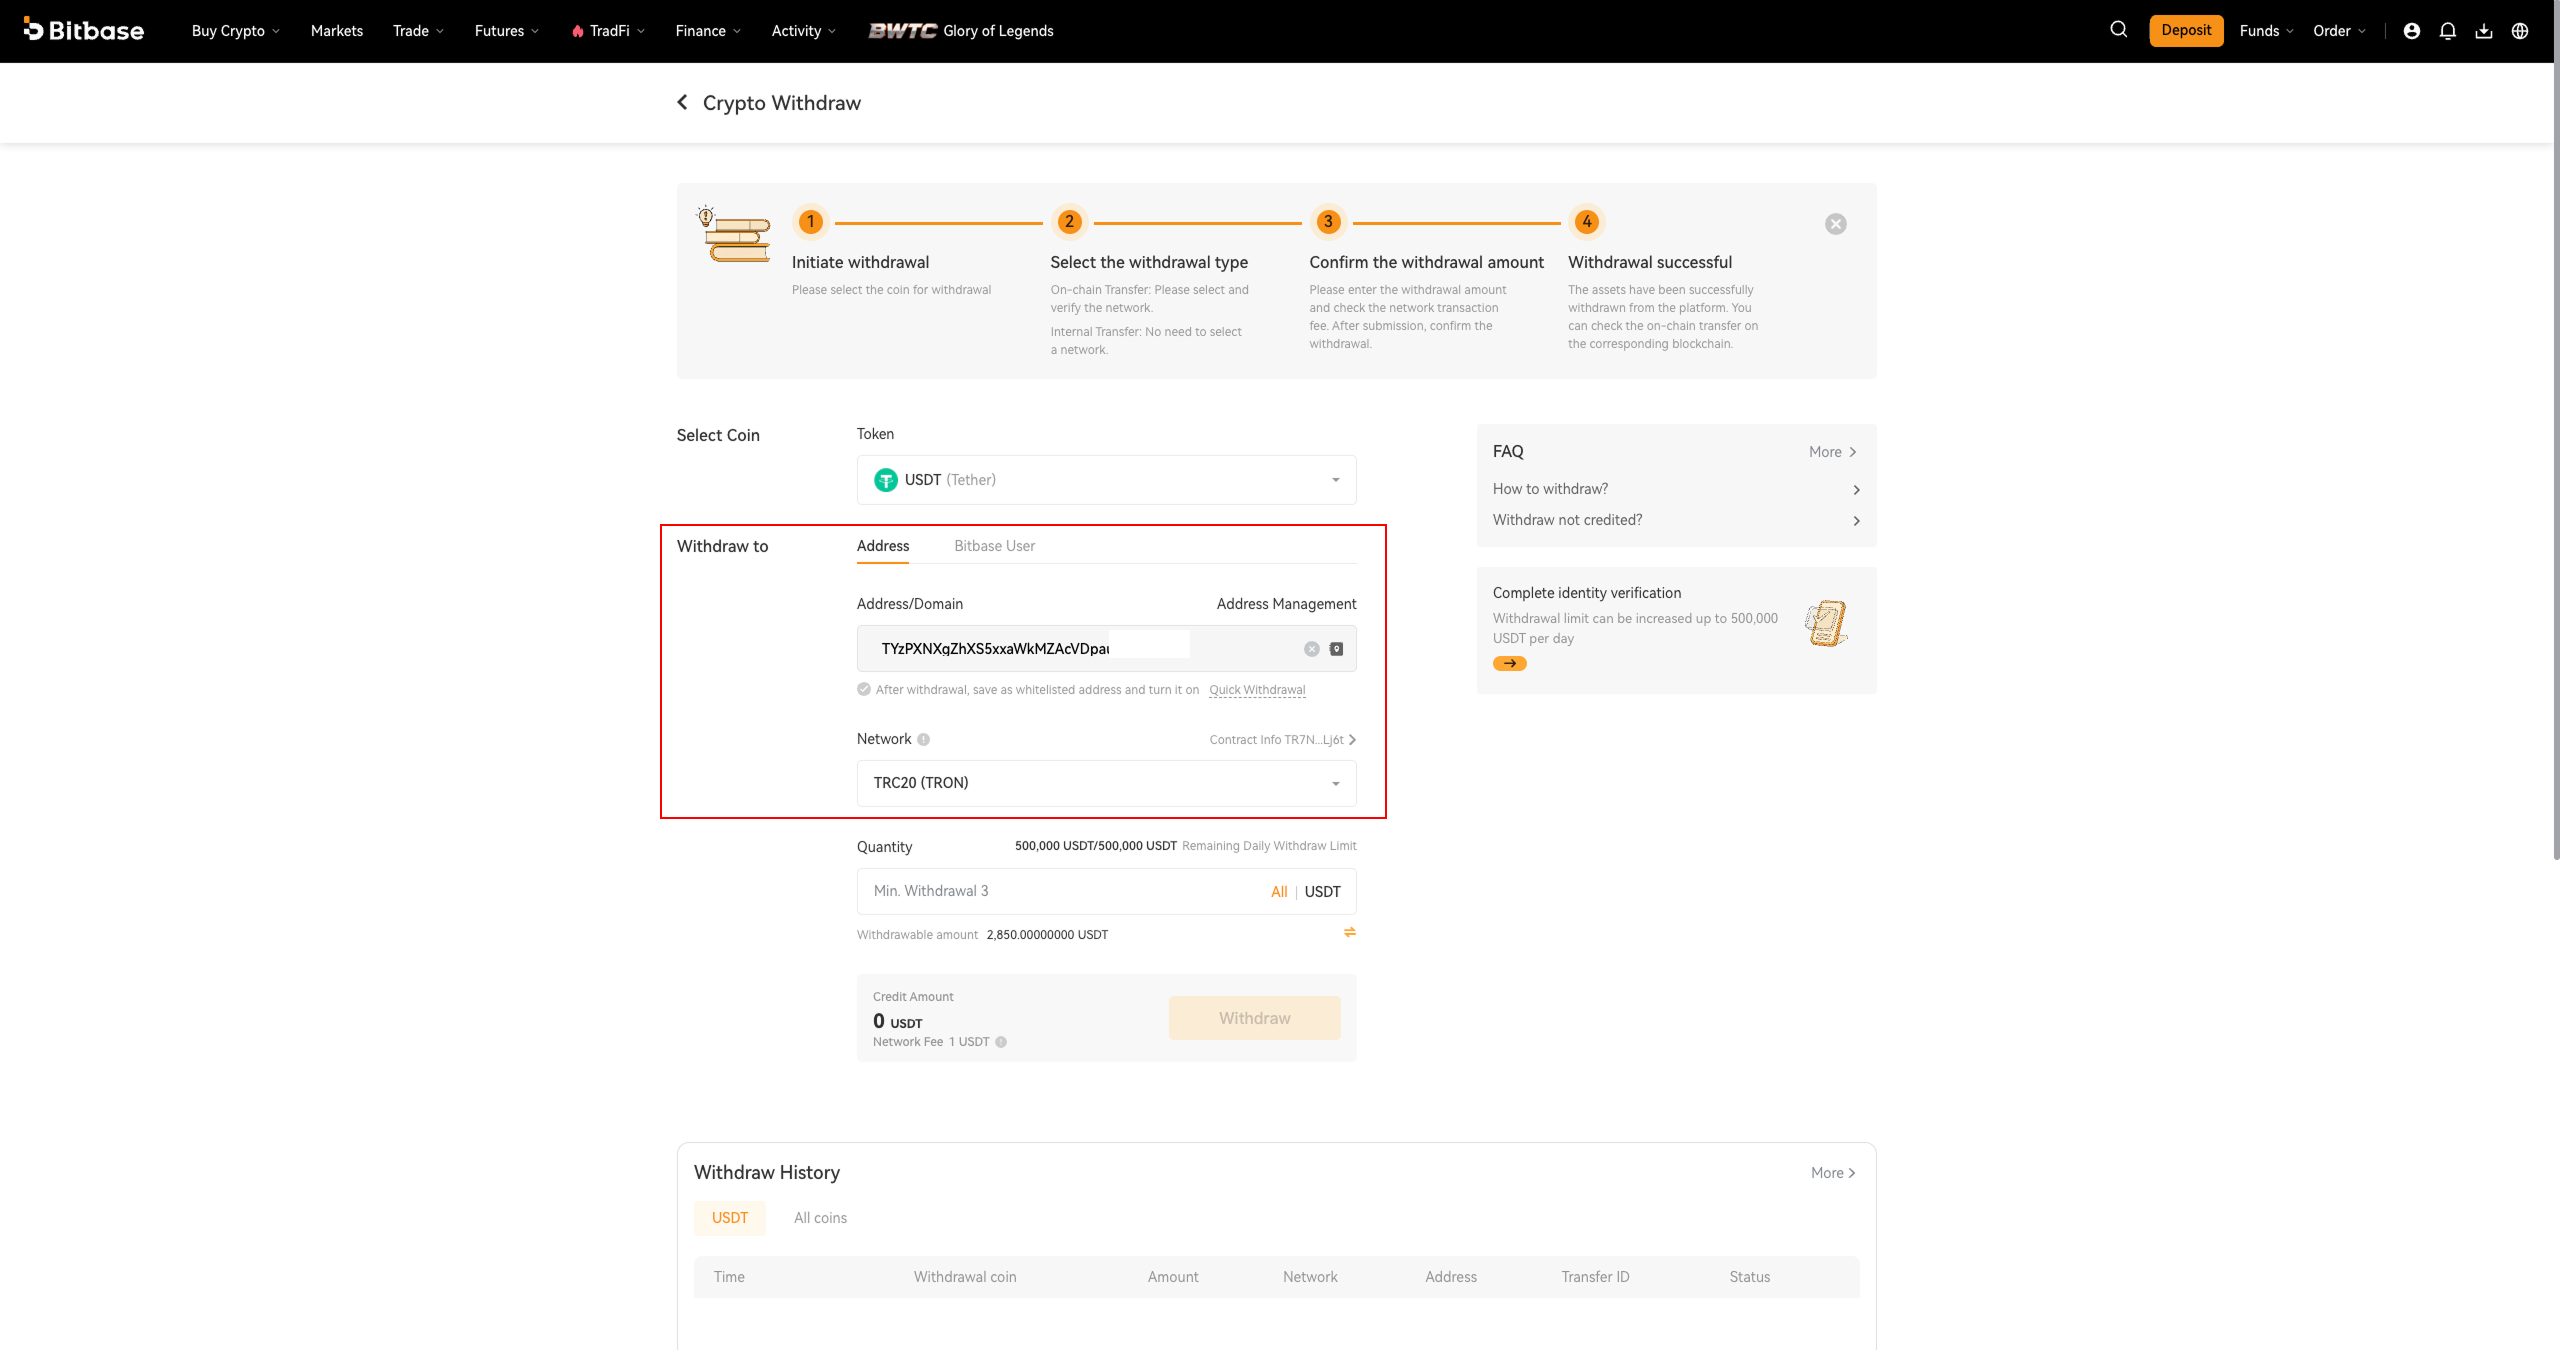
Step 2 · Enter the address and select the network
Under Withdraw to, use the Address tab to withdraw on-chain (or Bitbase User for a free internal transfer). Paste the recipient's Address/Domain, then choose the Network — it must match the receiving wallet's network. You can tick the option to save it as a whitelisted address and enable Quick Withdrawal for next time.
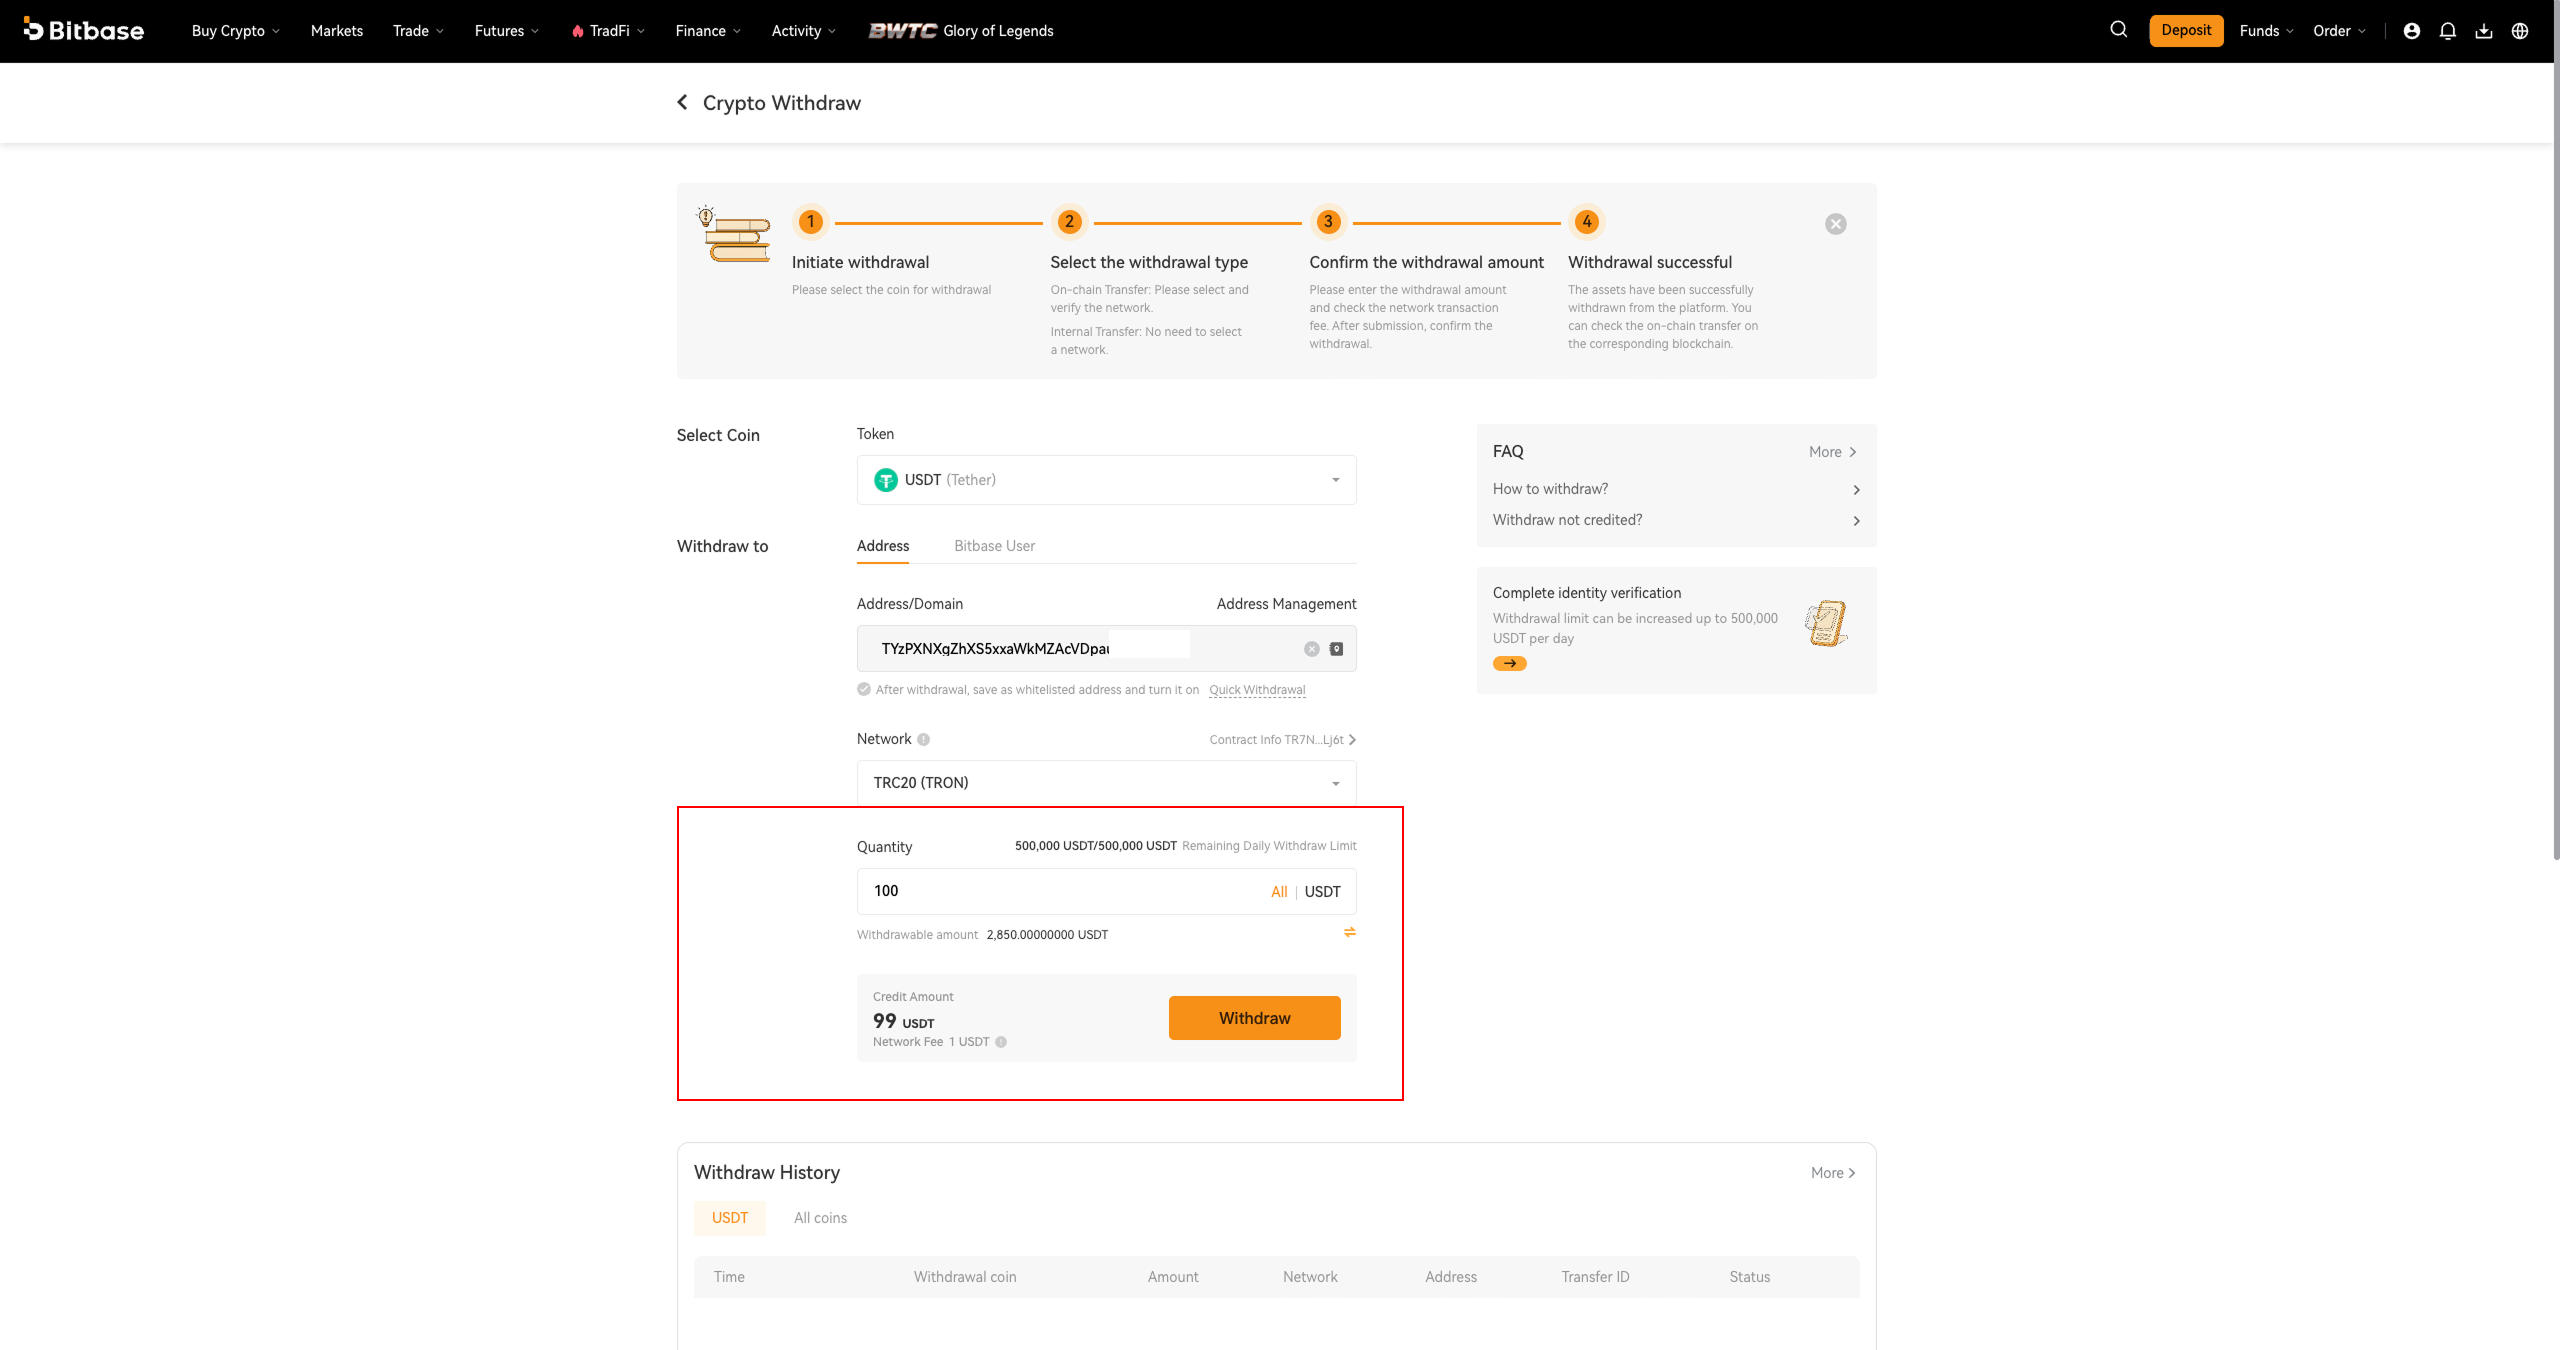
Step 3 · Enter the amount and review the details
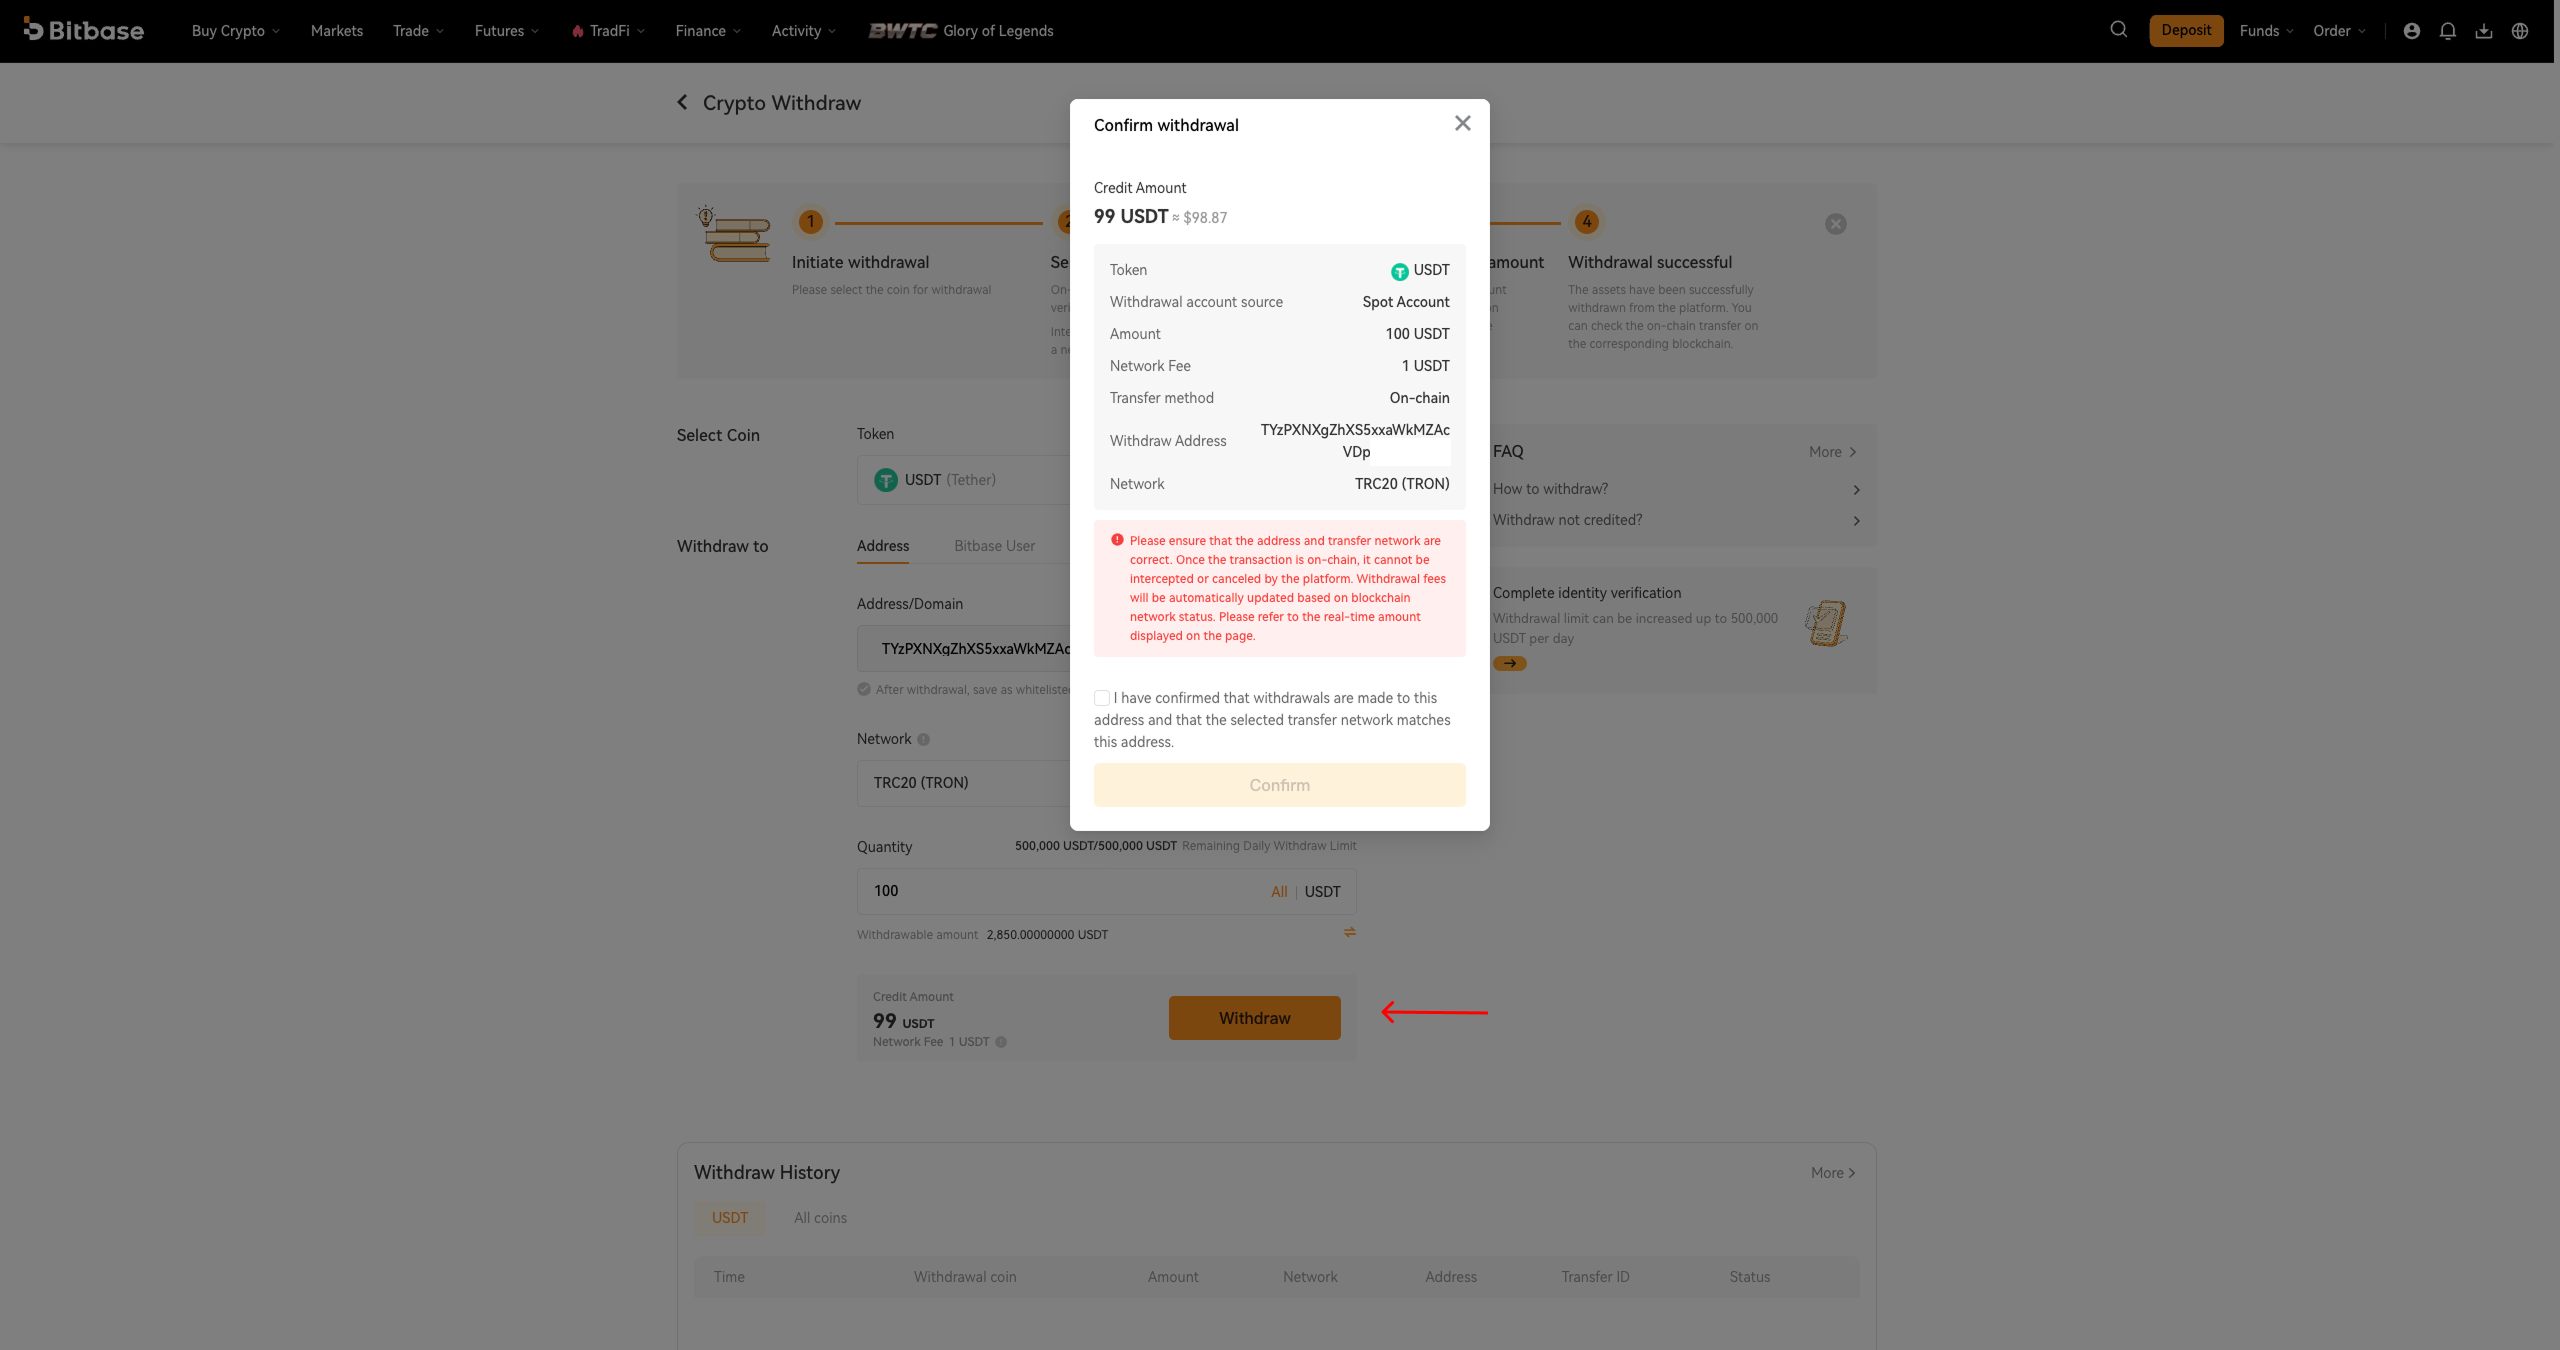
Enter the Quantity to withdraw (or click All), then review the Credit Amount and Network Fee. Double-check the address, network, and amount together — on-chain withdrawals cannot be reversed once submitted.
Step 4 · Confirm, verify, and finish
Click Withdraw, then complete the required security verification (such as 2FA, email, or SMS codes). After submission, the tracker shows Withdrawal successful, and you can follow the transfer on the corresponding blockchain.
Safety reminders
Always match the network on both the deposit and withdrawal sides — this is the most common cause of lost funds. Verify the destination address character by character, and consider whitelisting trusted addresses. Finally, never share your verification codes or passwords; Bitbase will never ask you for them.
This is an official Bitbase product tutorial, provided for educational and informational purposes. Interface details, fees, and limits may change; always refer to the live bitbase.com for the latest. Written as of June 2026.